Electrics, other than the engine bay loom, are fitted and tested:

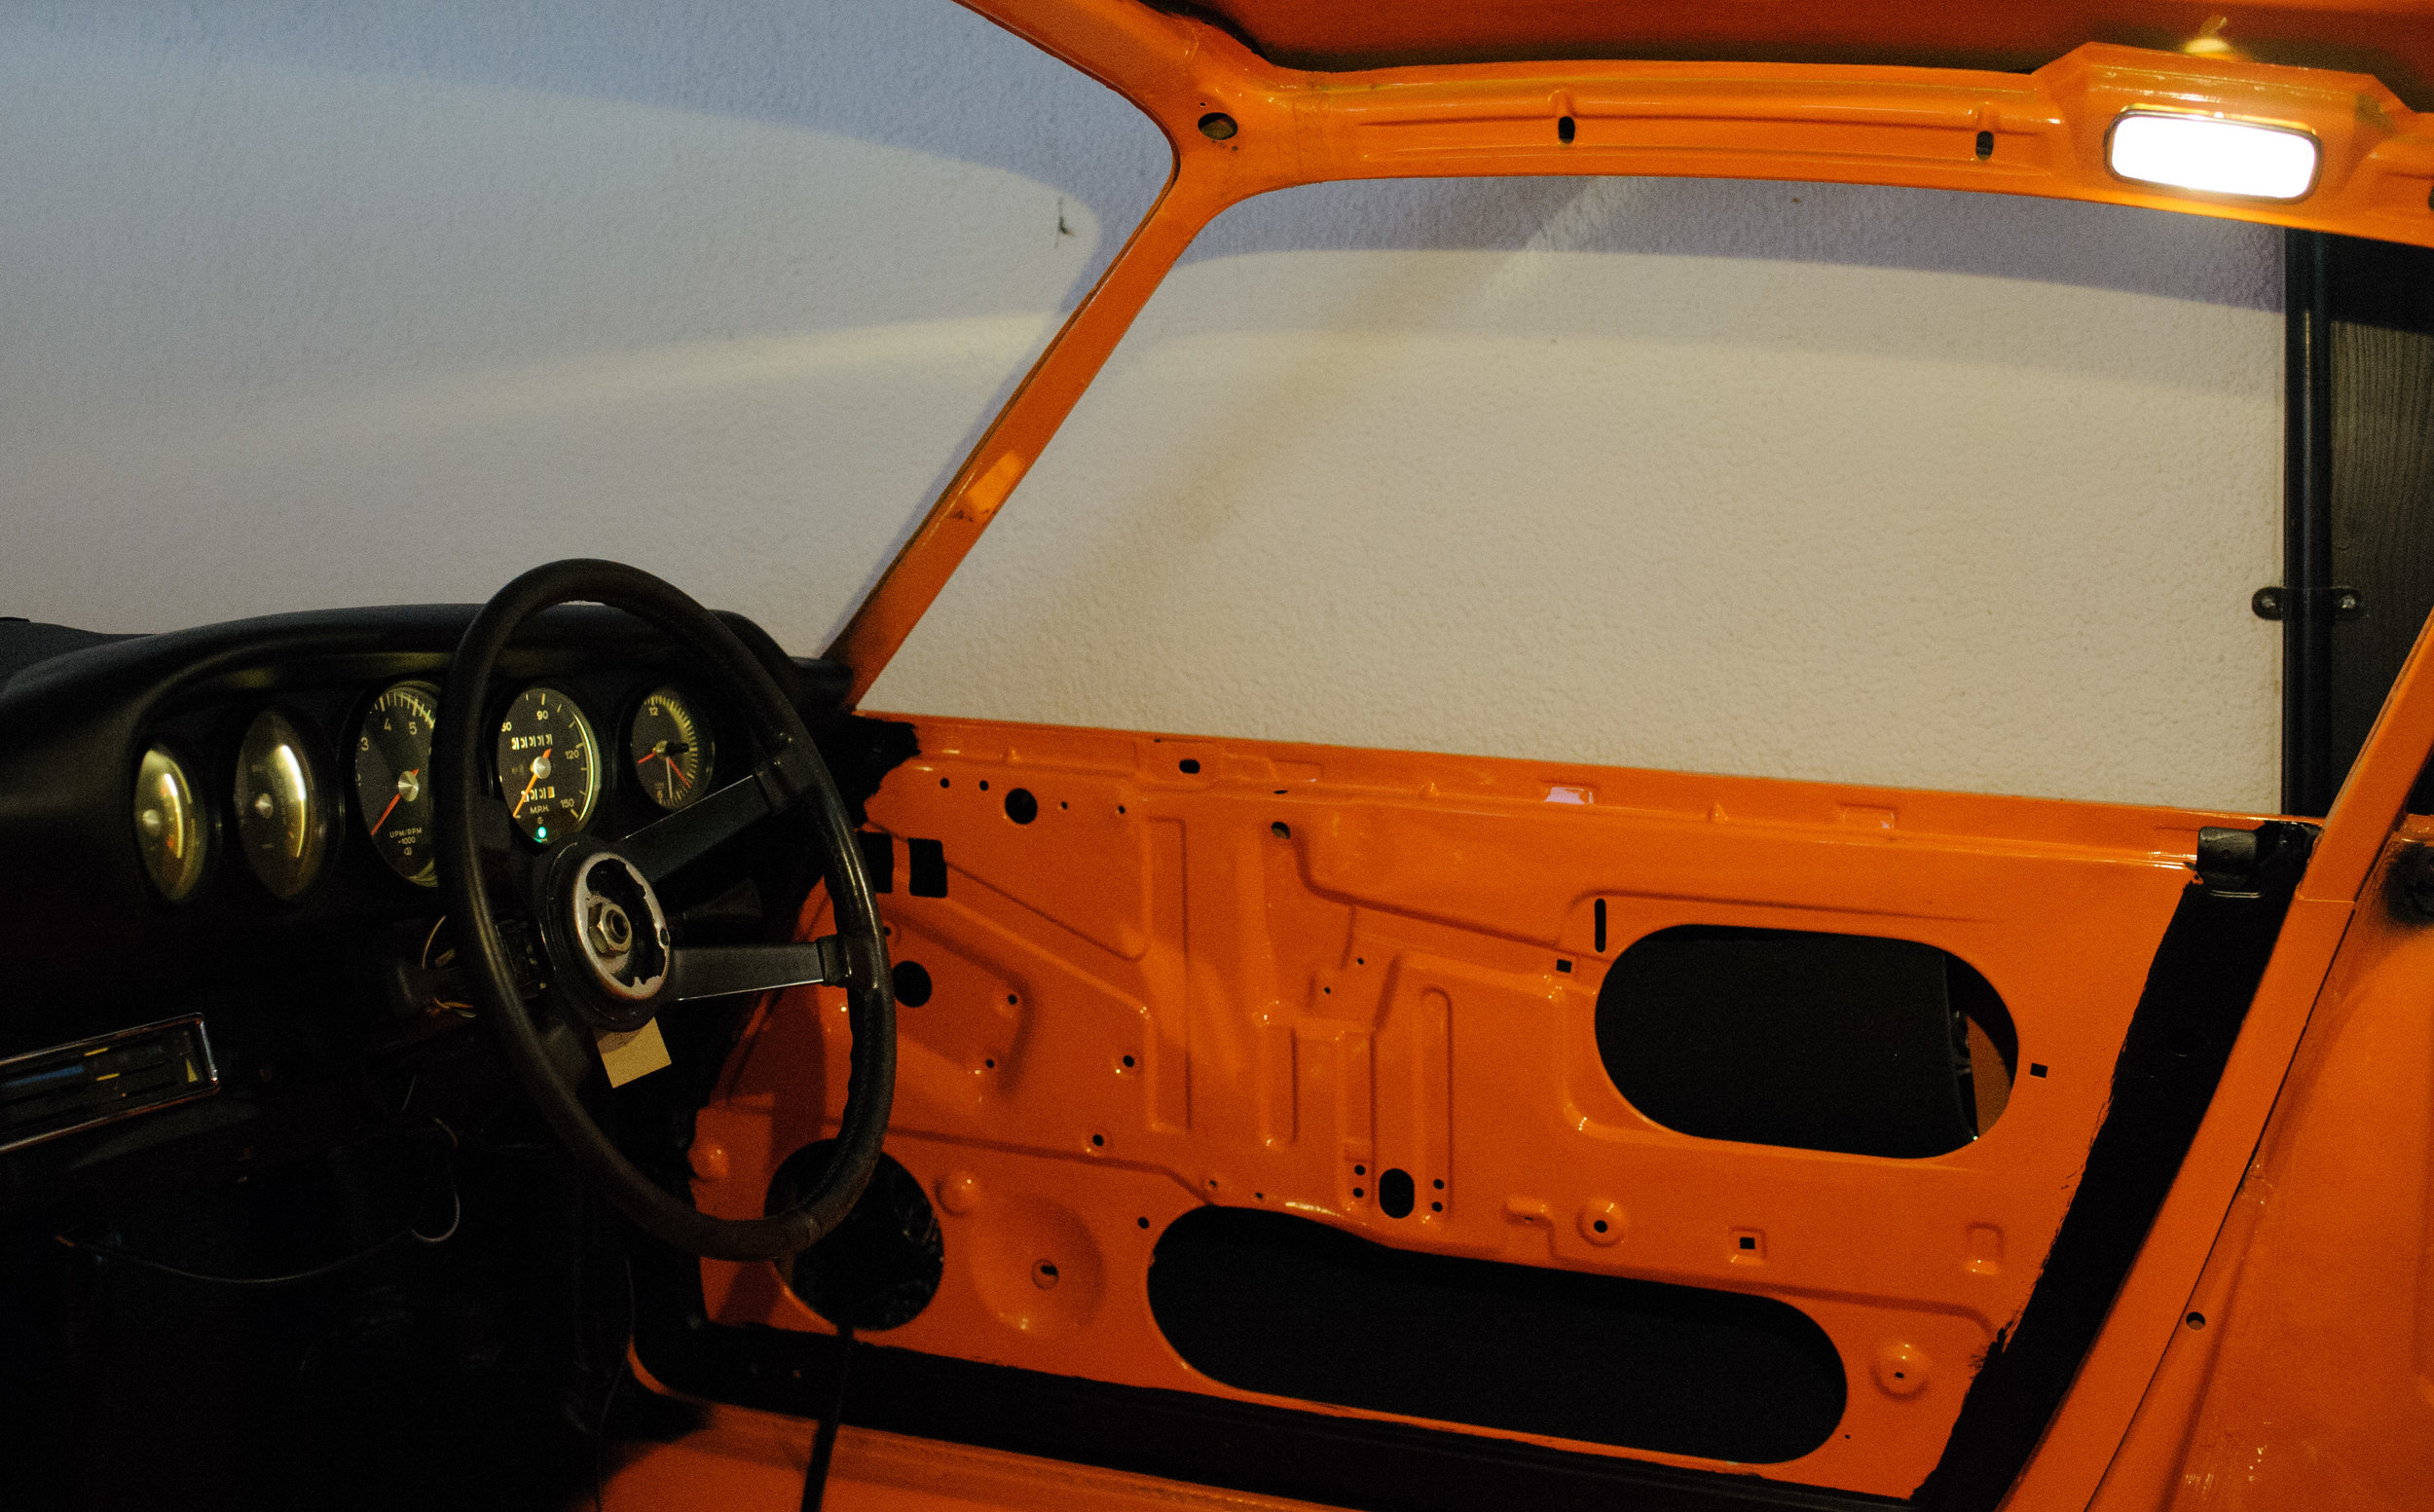
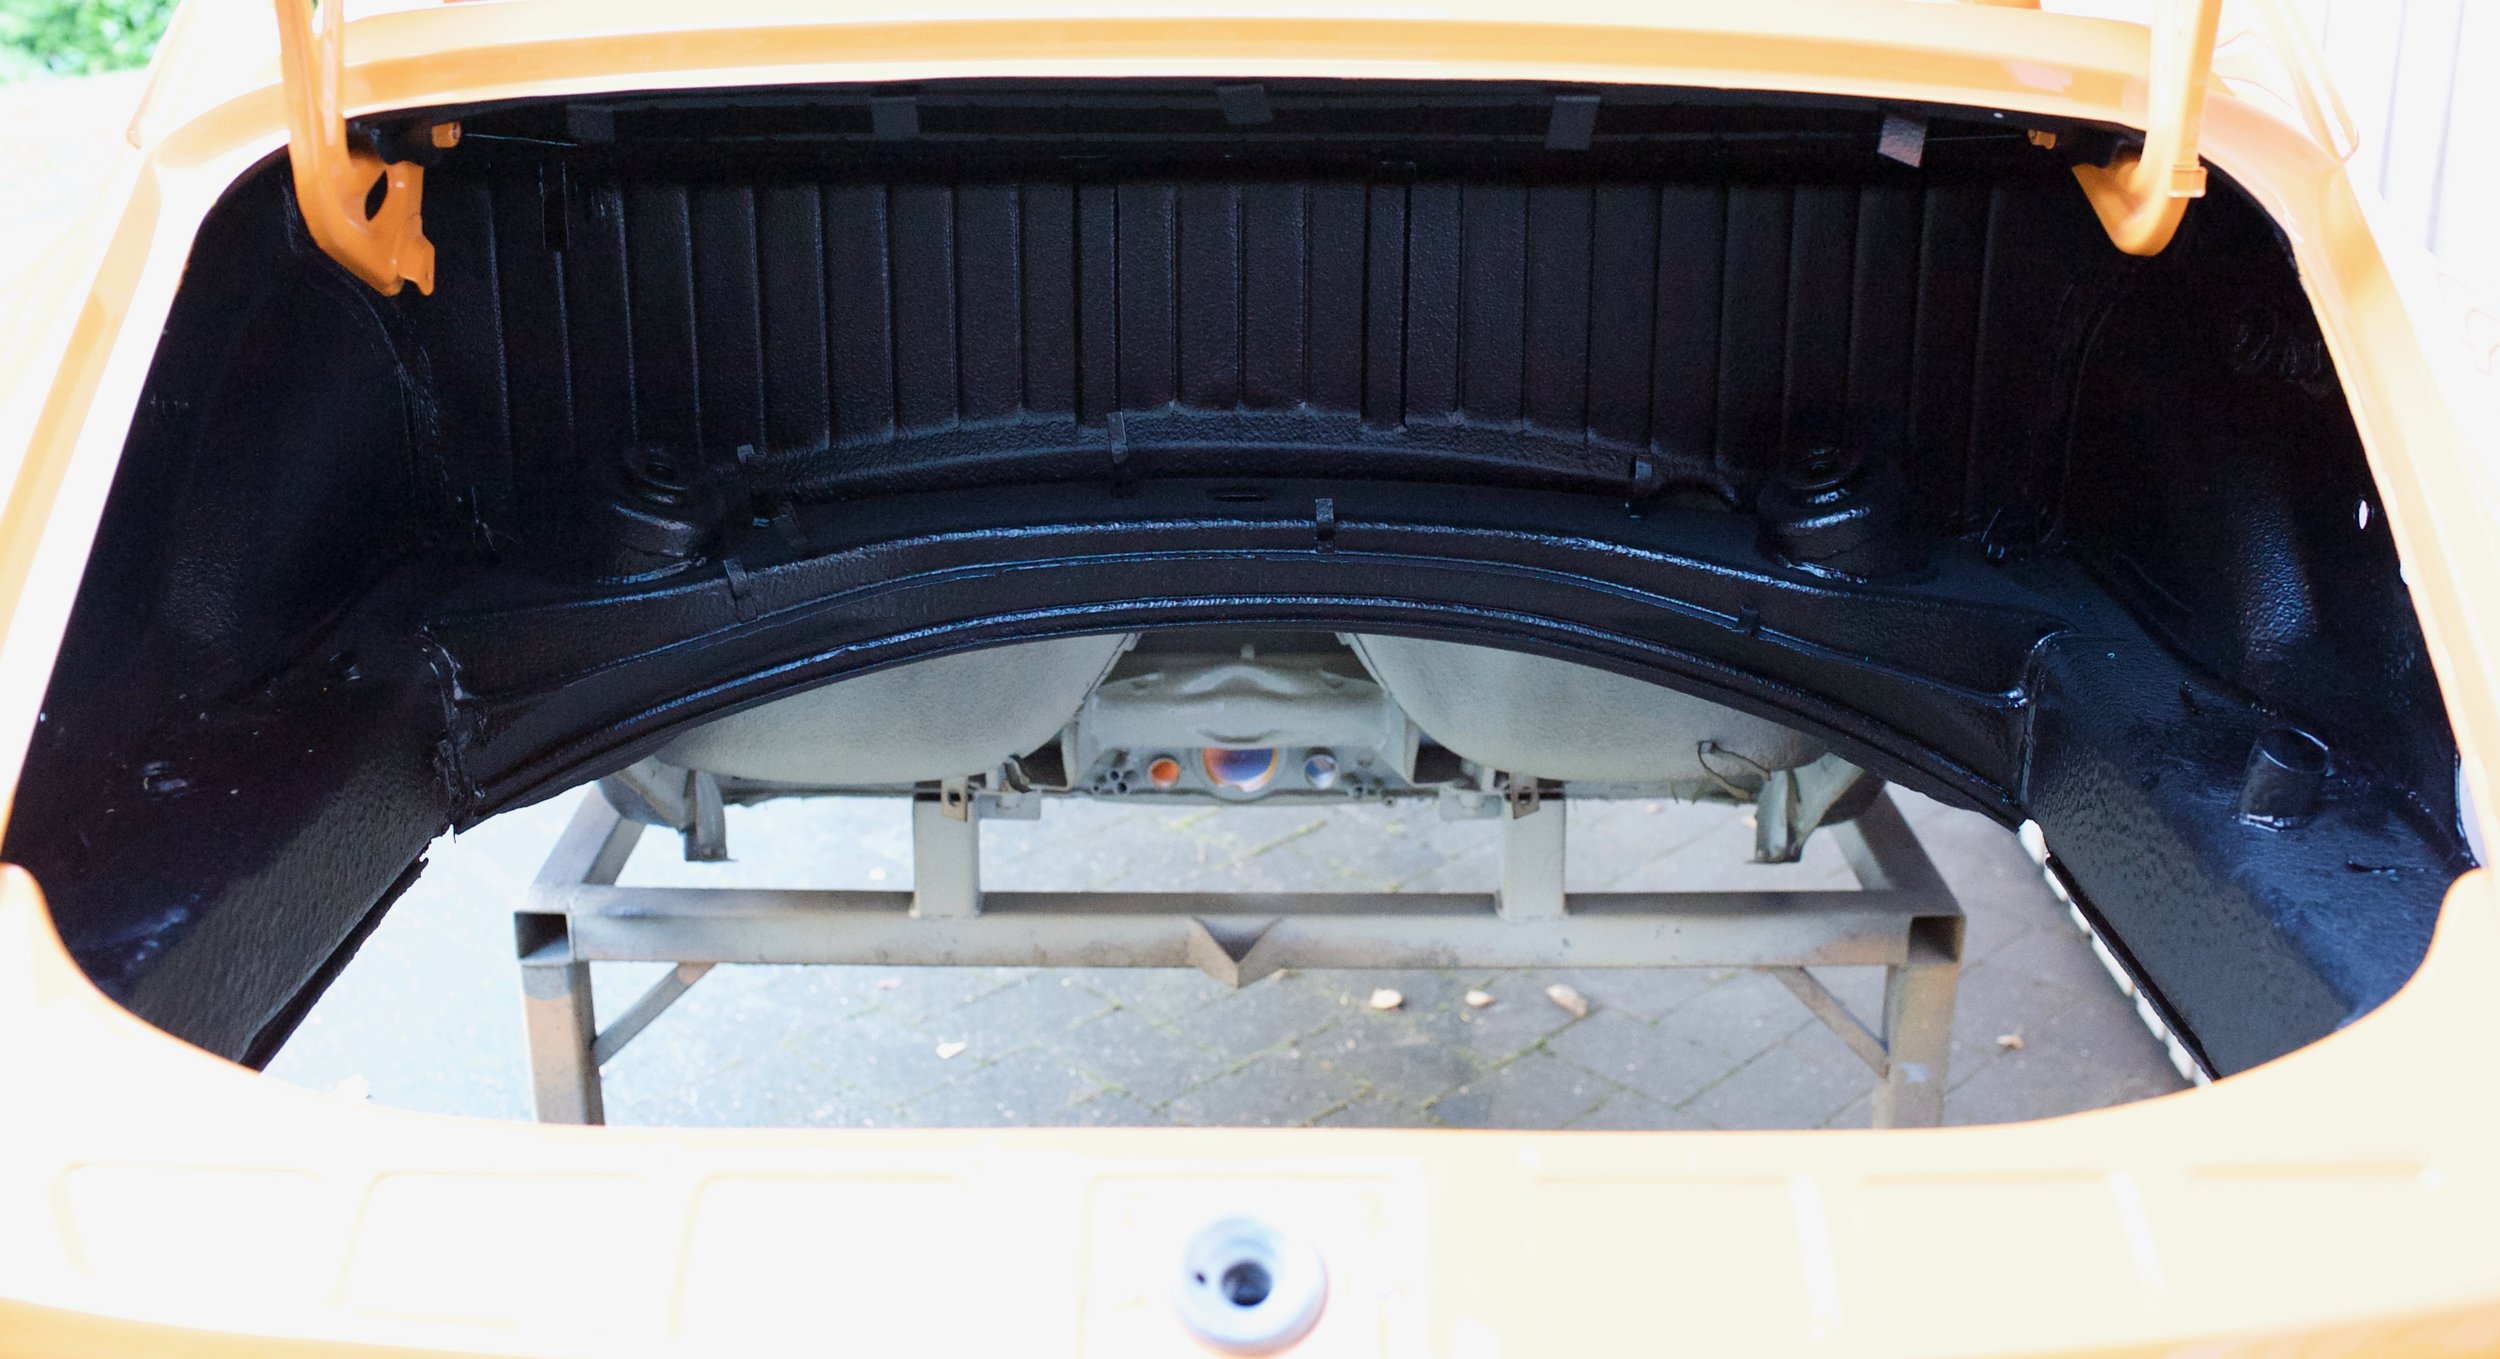
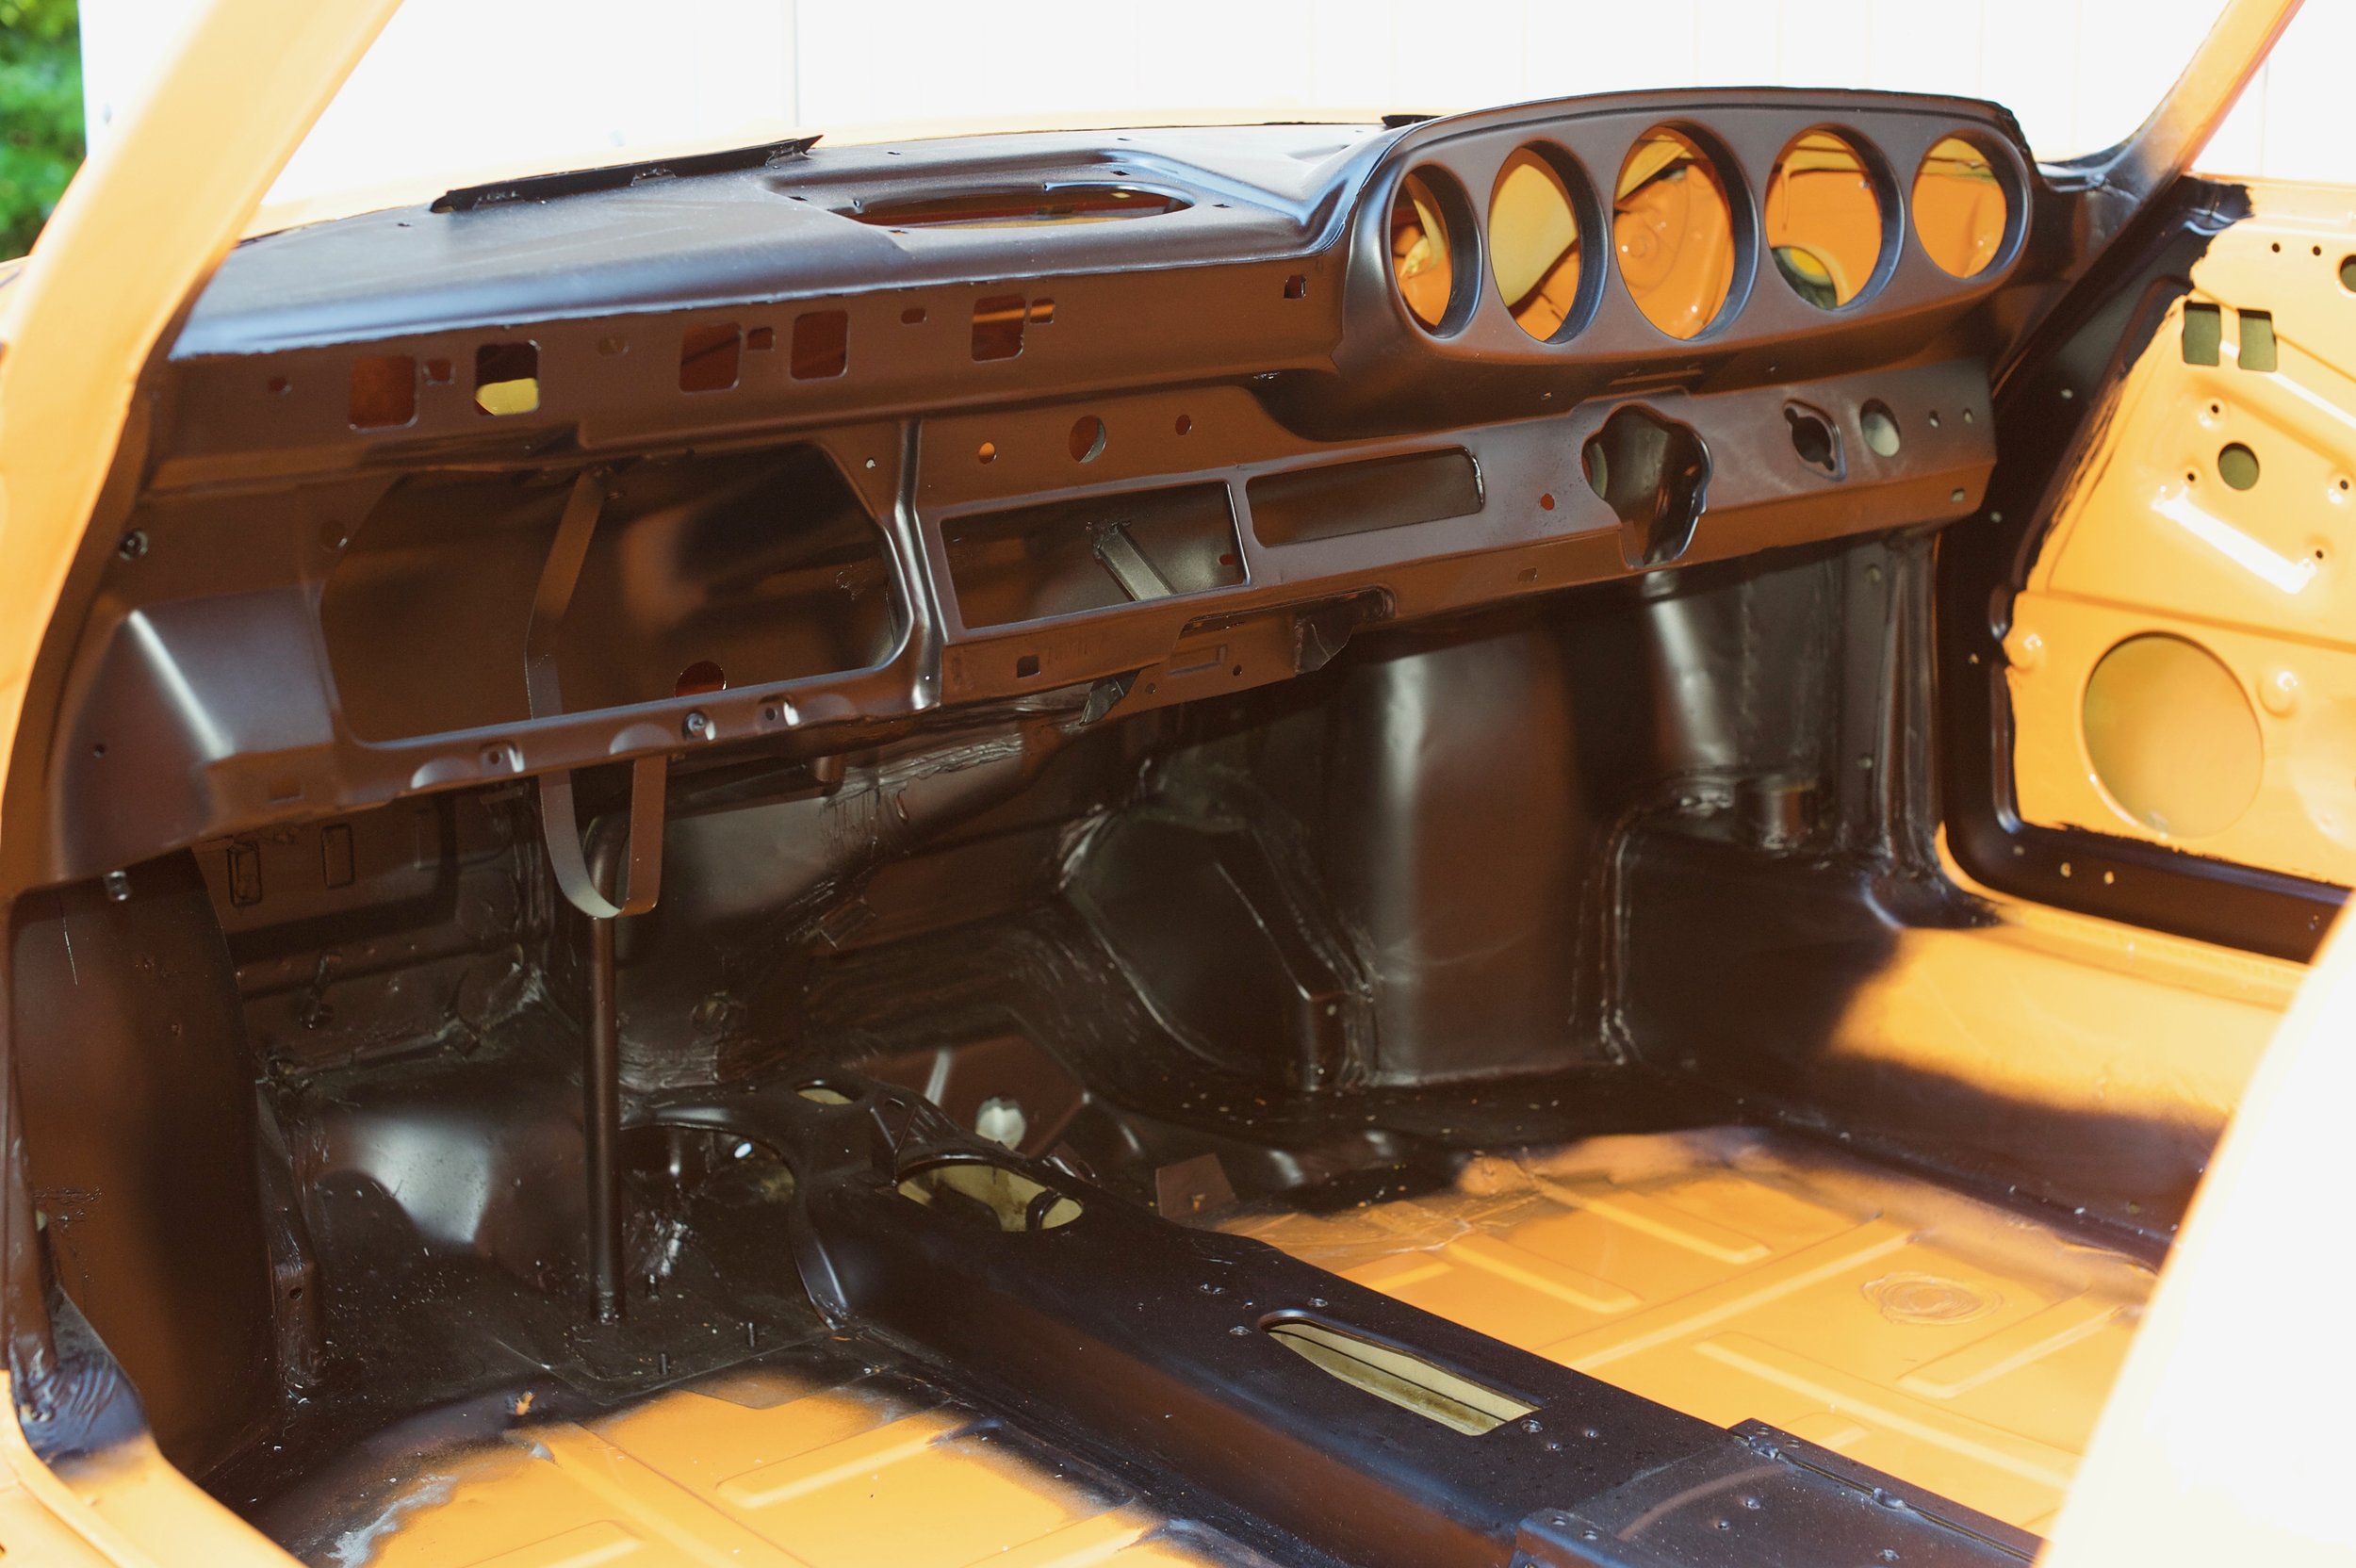
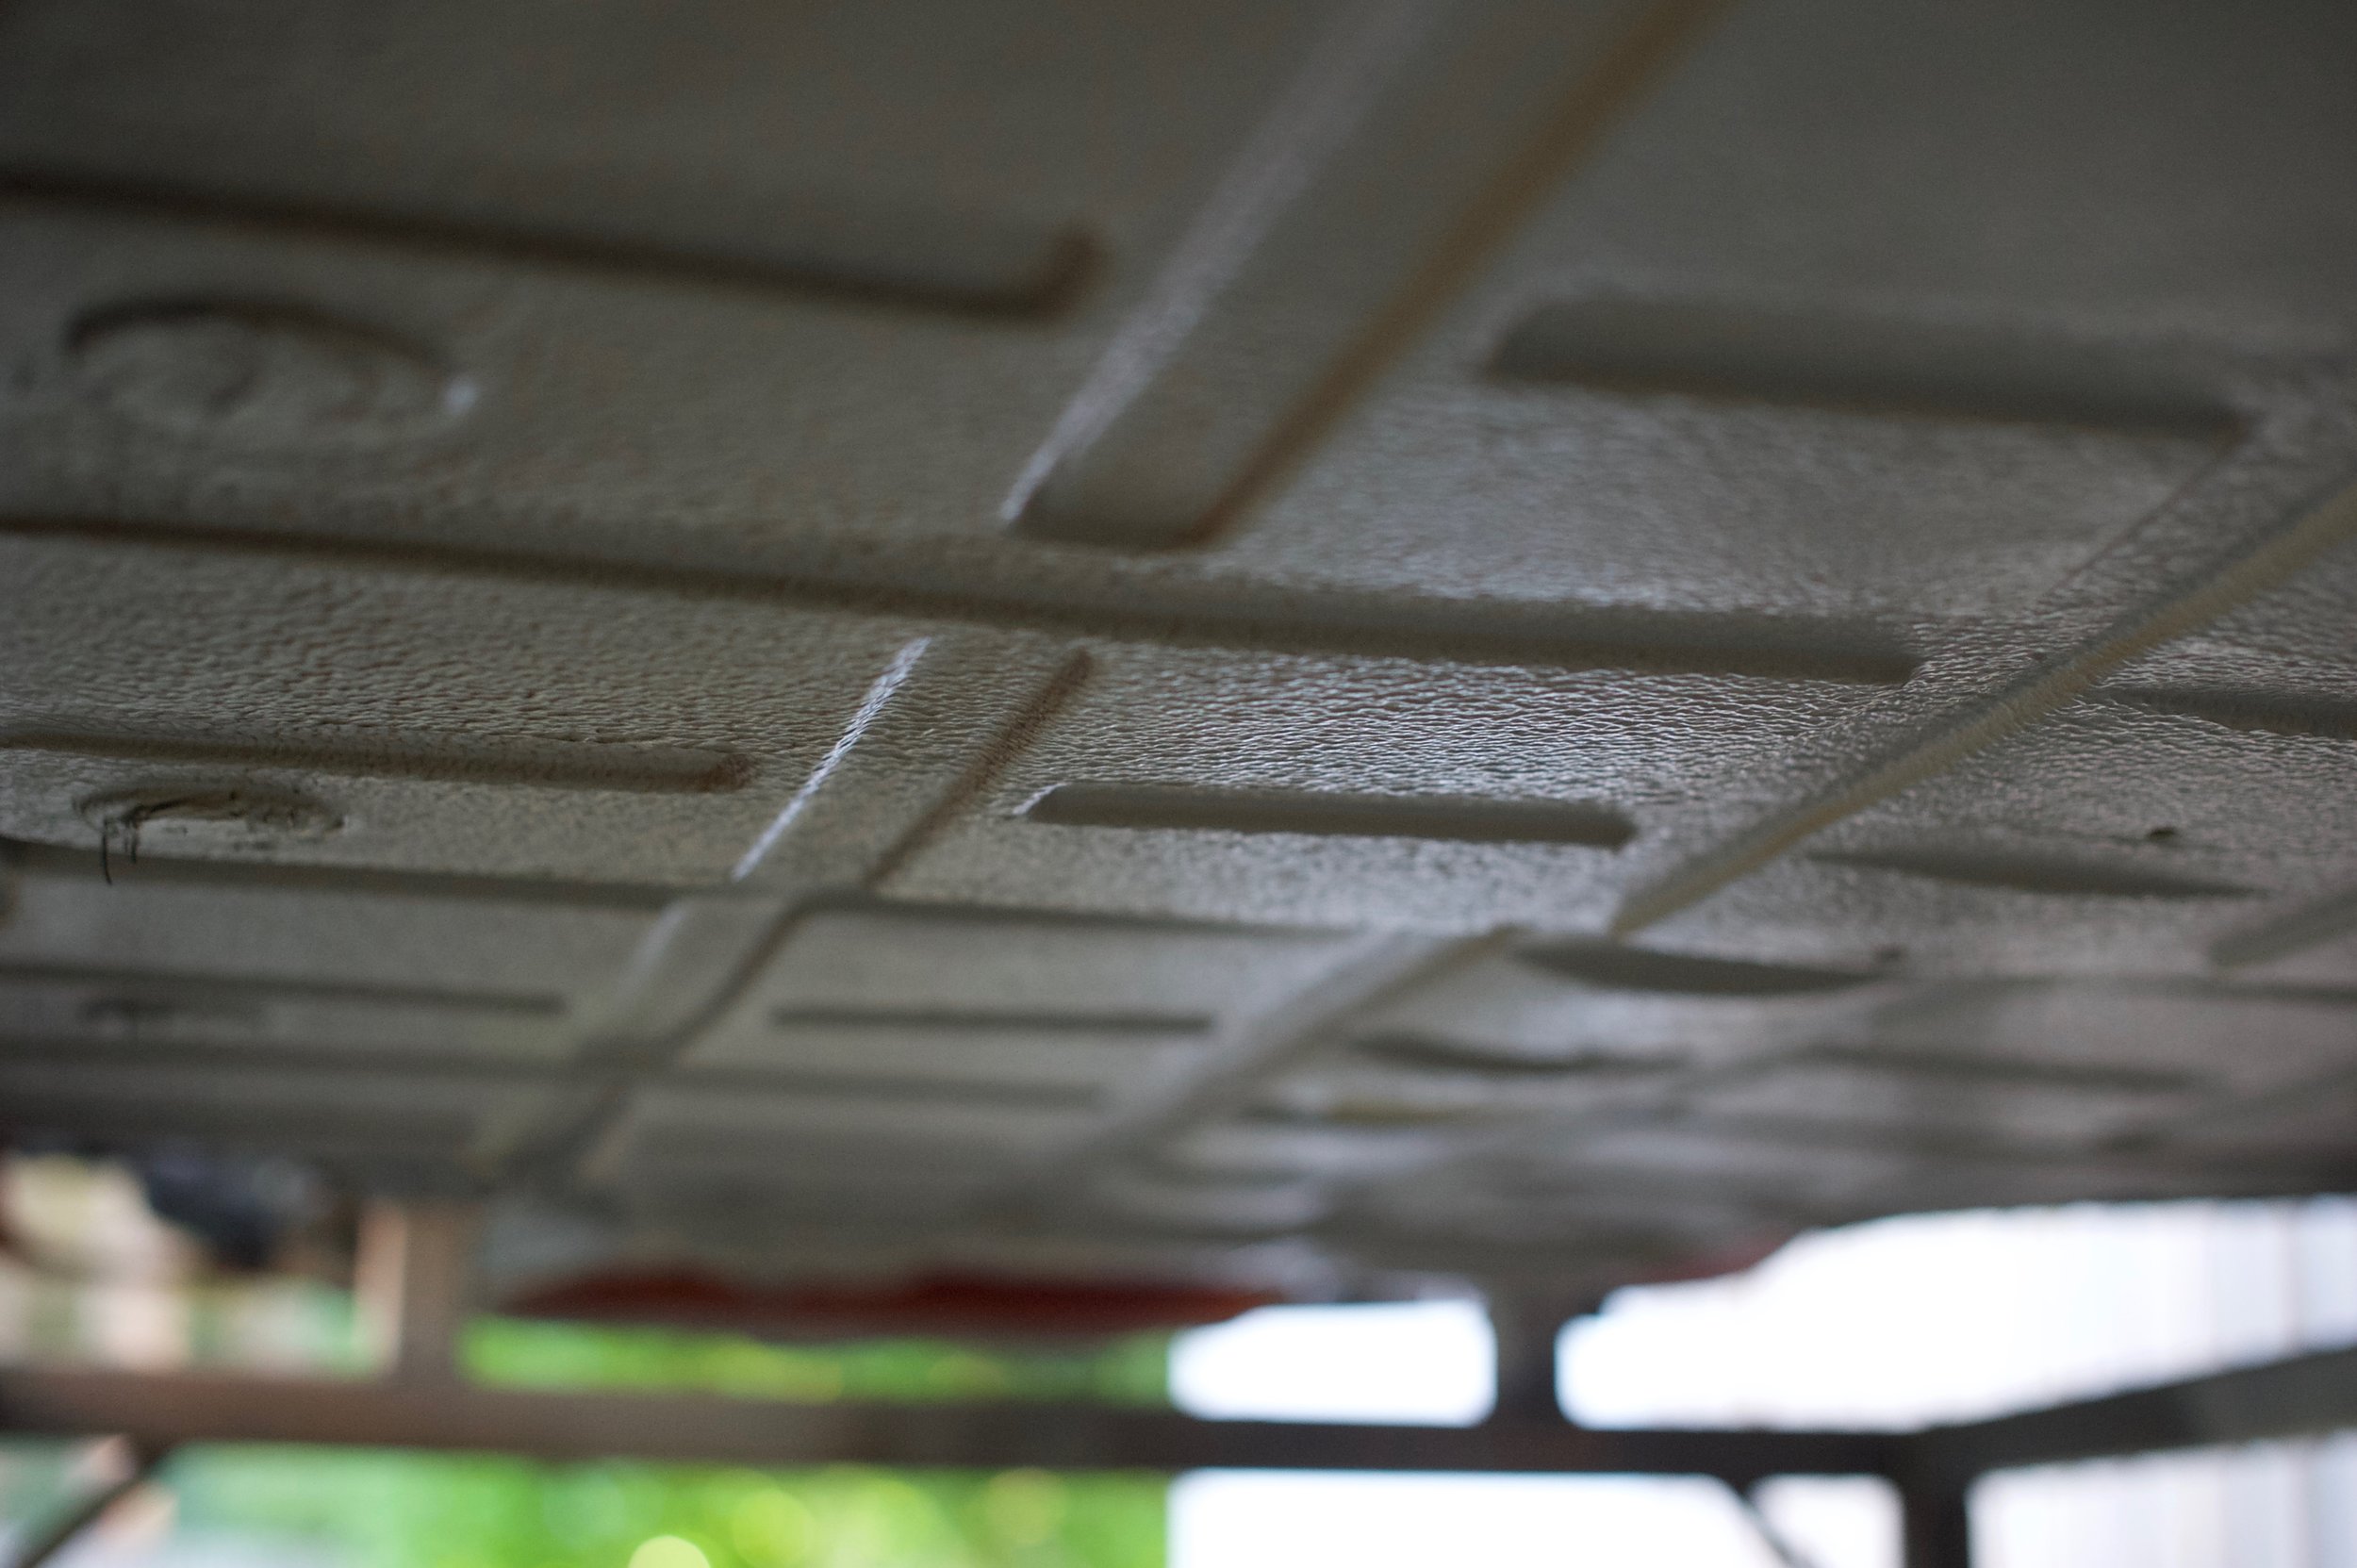
And overall it's starting to look a bit more like a car, and a bit less like a bare shell:

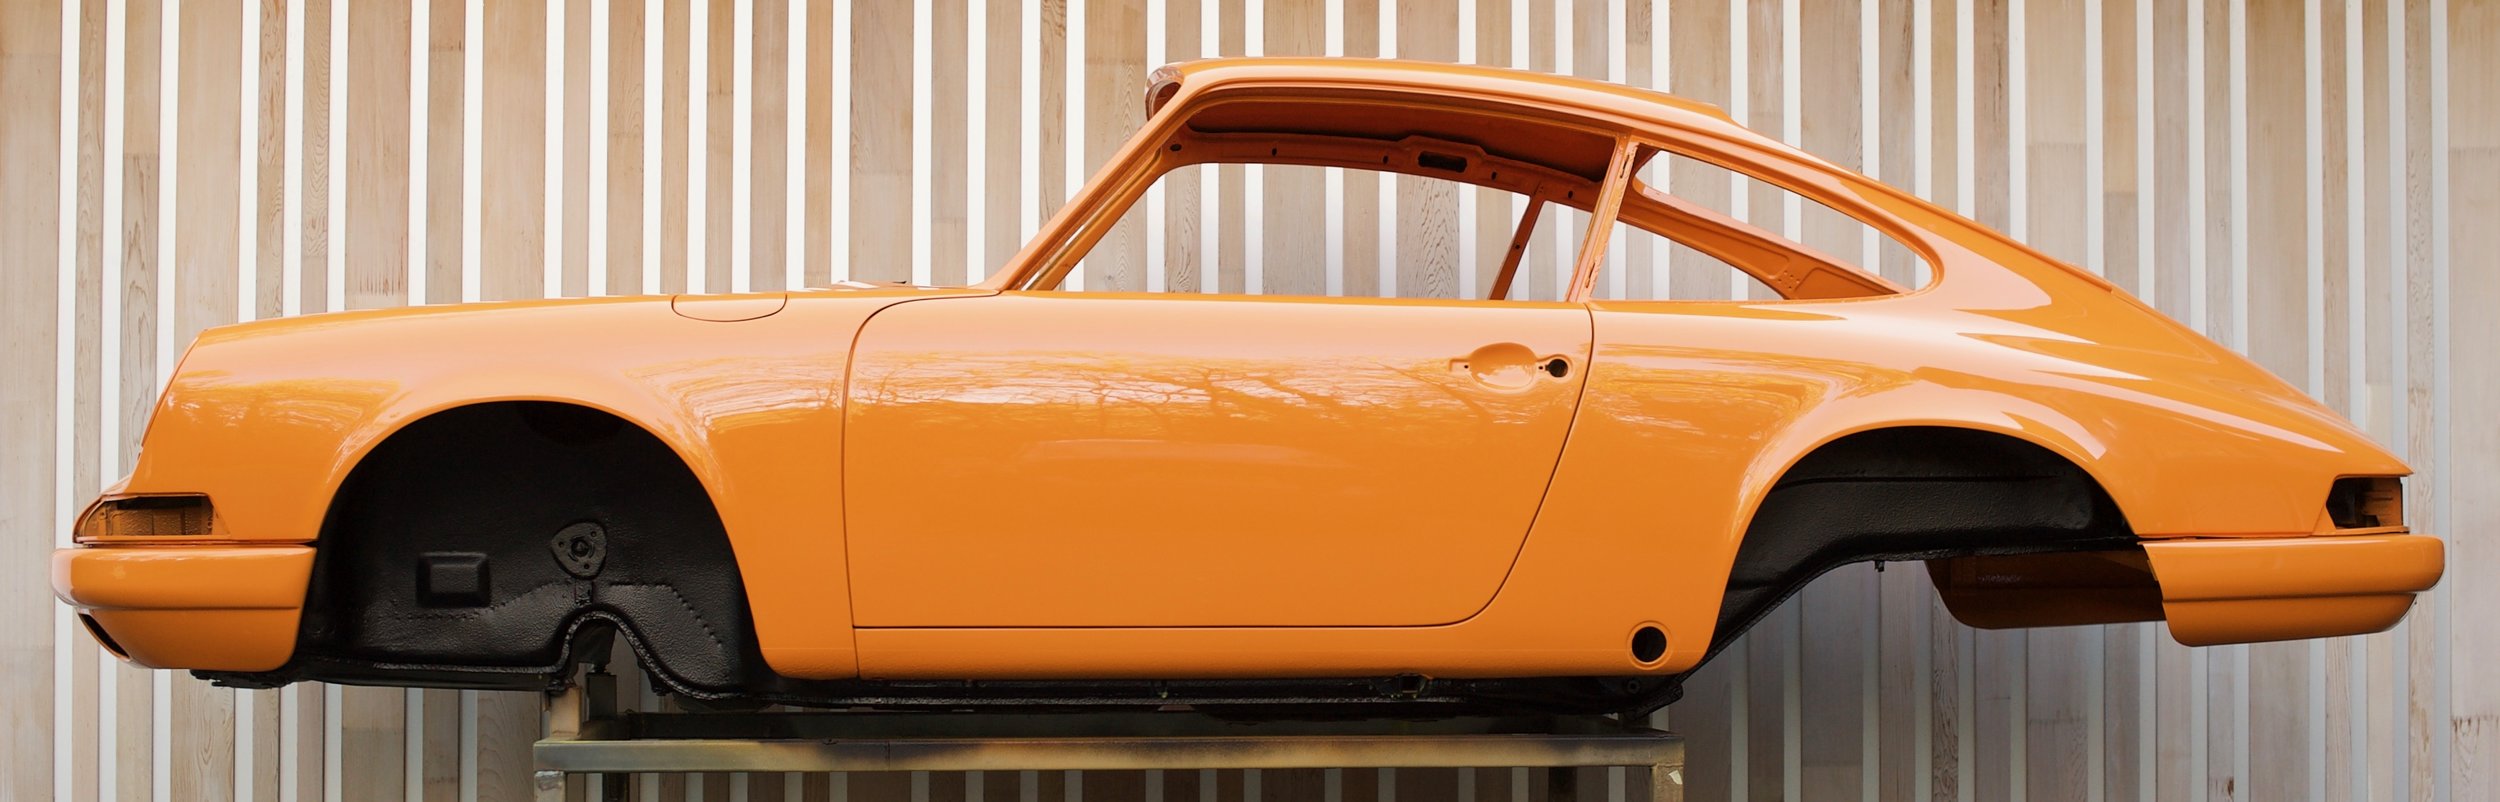
Restoration of my 1970 Porsche 911S.
Electrics, other than the engine bay loom, are fitted and tested:
And overall it's starting to look a bit more like a car, and a bit less like a bare shell:
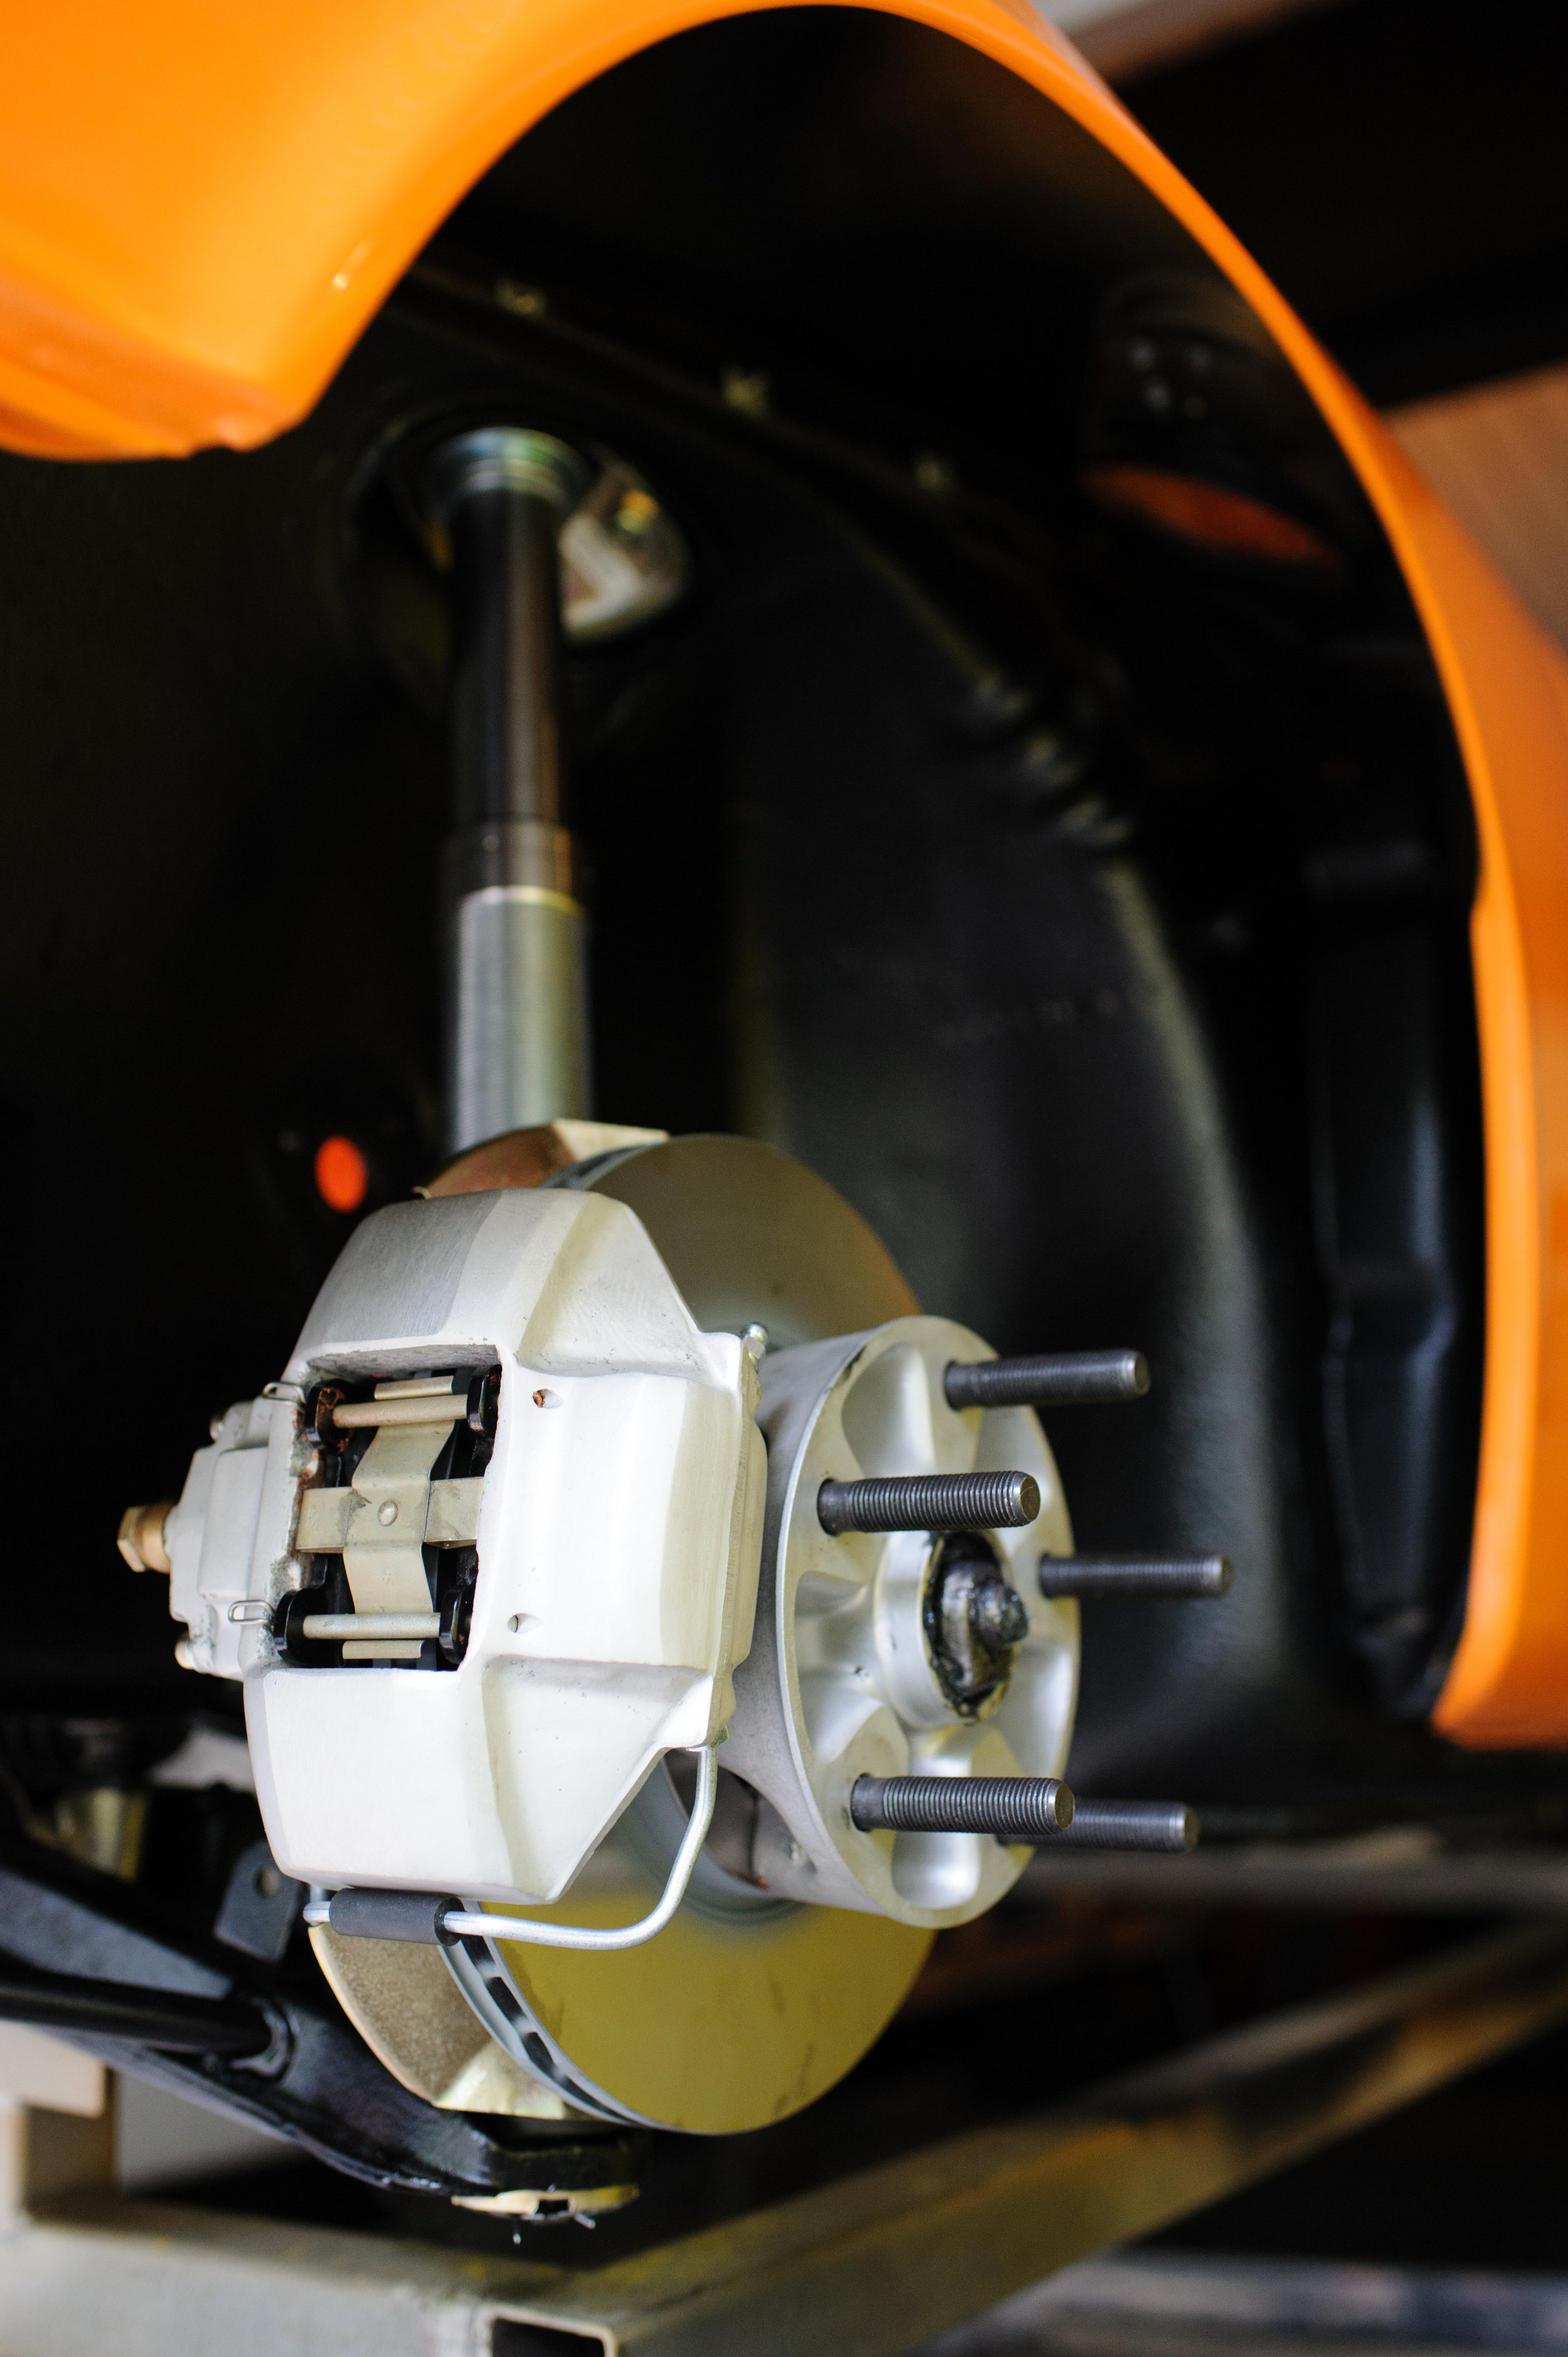
I've made modest progress on the suspension and brakes. They are "nearly" done.
Being RHD there are hard lines across the luggage compartment from the reservoir, which then join to the master cylinder via some short soft lines and kinked hard lines, behind the pedal box. A bit convoluted.
In summary most of this lot is now on the car. With the predictable side effect that it is no longer cluttering up every shelf in my garage / shed / house. Feels like progress.
After some rock & roll excitement from the 1970s, back in 2018 we turn our minds to something a little more prosaic.
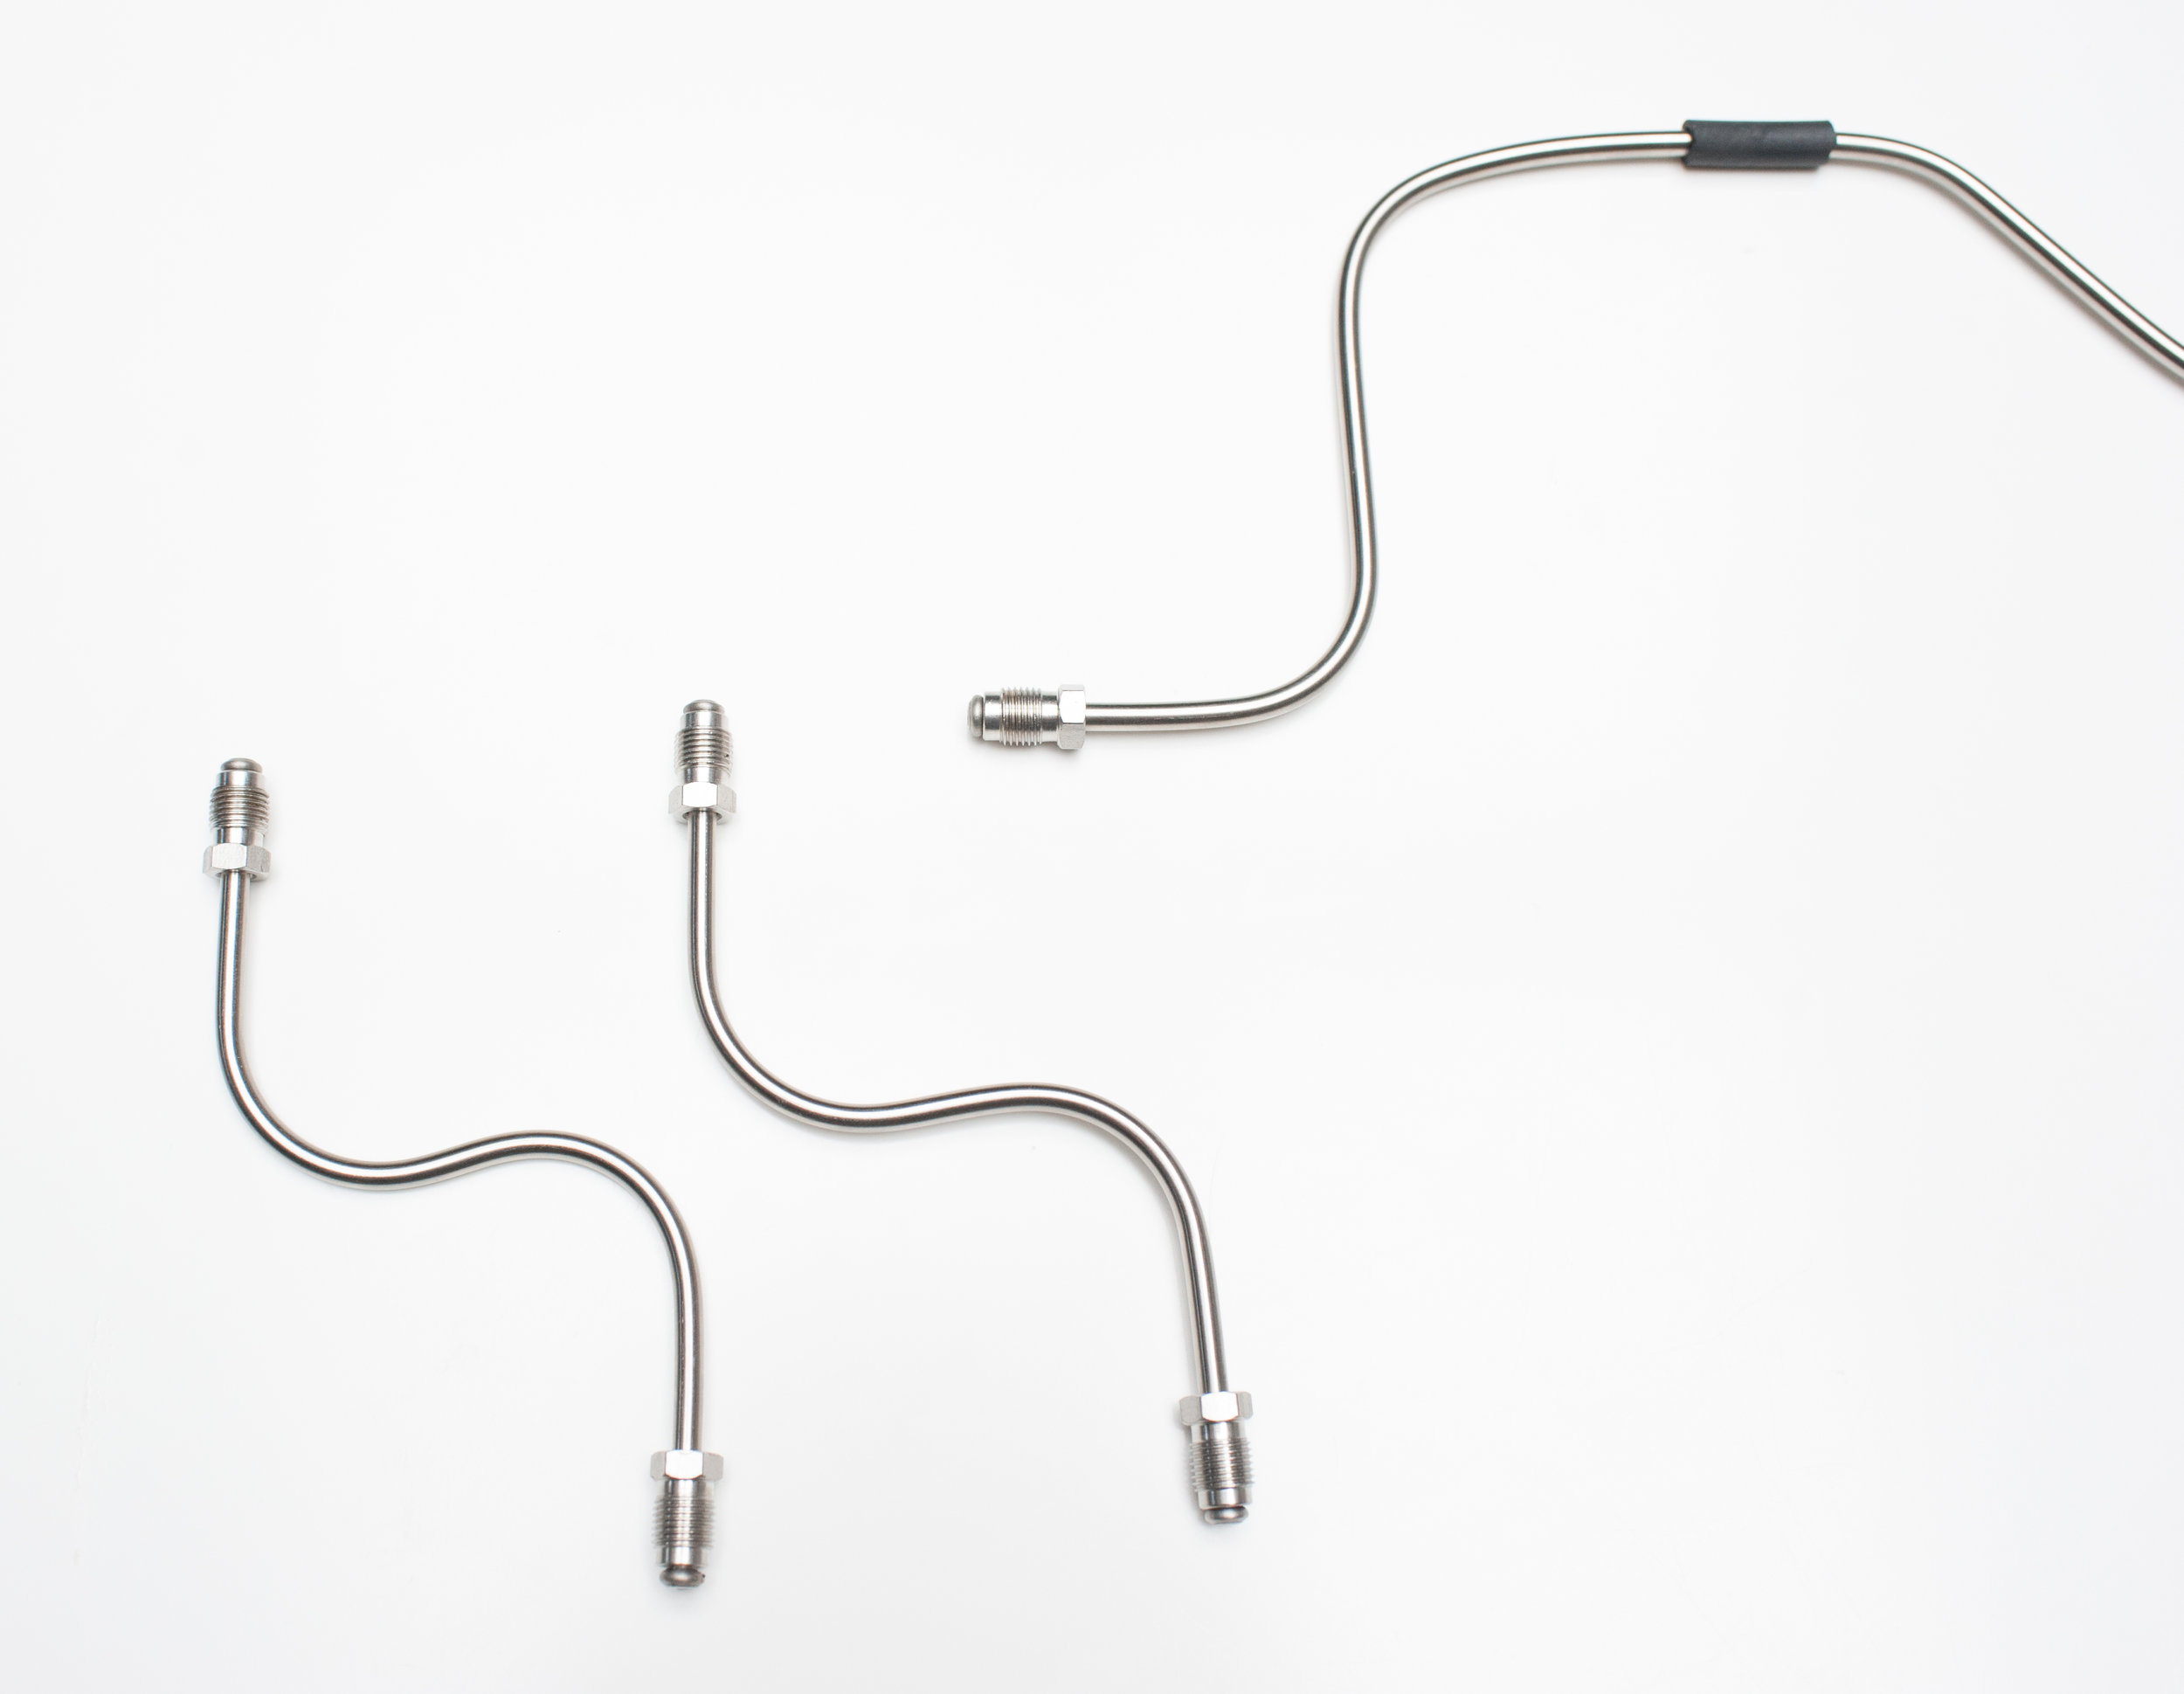
Today, I have mostly been making brake lines.
This may seem unnecessarily masochistic, when pre-bent kits are available from various places. I went DIY partly for entertainment value - pipe bending is another curiously satisfying pastime, and there's the extra fun of brake pedal roulette when it's time to use them.
The other reason was material choice. Pre-made pipes seem to be either mild steel (plain or coated), copper or kunifer (copper-nickel alloy). I'll admit that kunifer is probably the best stuff for the job, but without wishing to offend anyone who is using this excellent material, to me it looks wrong on an early car.
So I've gone with annealed stainless steel, which is also wrong, but looks a bit less offensive to my delicate eyes. It's not bad at all to work with, although a bit tougher than kunifer.
There's arguably a bit of anecdote value in the Eric Clapton connection. And it's fun to imagine the stories my car could tell from its time with Eric, and with Bobby Whitlock. Whitlock was the keyboard player in Derek and the Dominoes, and Eric gave him the orange Porsche sometime in 1970. The car is mentioned in biographies / autobiographies of both Clapton and Whitlock.
But, on reflection, the part I think I like the most is the little home movie. Please see gif below. There is something about seeing my car in motion in 1970, and seeing the details (as much as can be discerned from a few seconds of low quality film). I can at least see the stance, how it moves over the bumps, get some idea of spec and how the colour looked. I like it!

I will admit that I find the high-end collector car adverts, which tend to prominently mention the most minor of celebrity associations, a bit silly. Celeb celeb blah blah blah.
I should say I used to find them a bit silly. Until today. Today I have established beyond reasonable doubt that my car is ex Eric Clapton.
So now I've decided it's cool.
The story goes that a (Porsche) friend of mine recently attended the UK premiere of the new Eric Clapton biopic "Life in 12 Bars". He mentioned that in the film there's a brief shot taken from old home movies, around 1970, of an orange 911 whizzing up the drive of Eric's house. Hmmm, there weren't so many RHD 911s in 1970, and even fewer orange ones. So I watched the film. It's rather good, I think.
My favourite part is the bit with MY ACTUAL CAR in it:
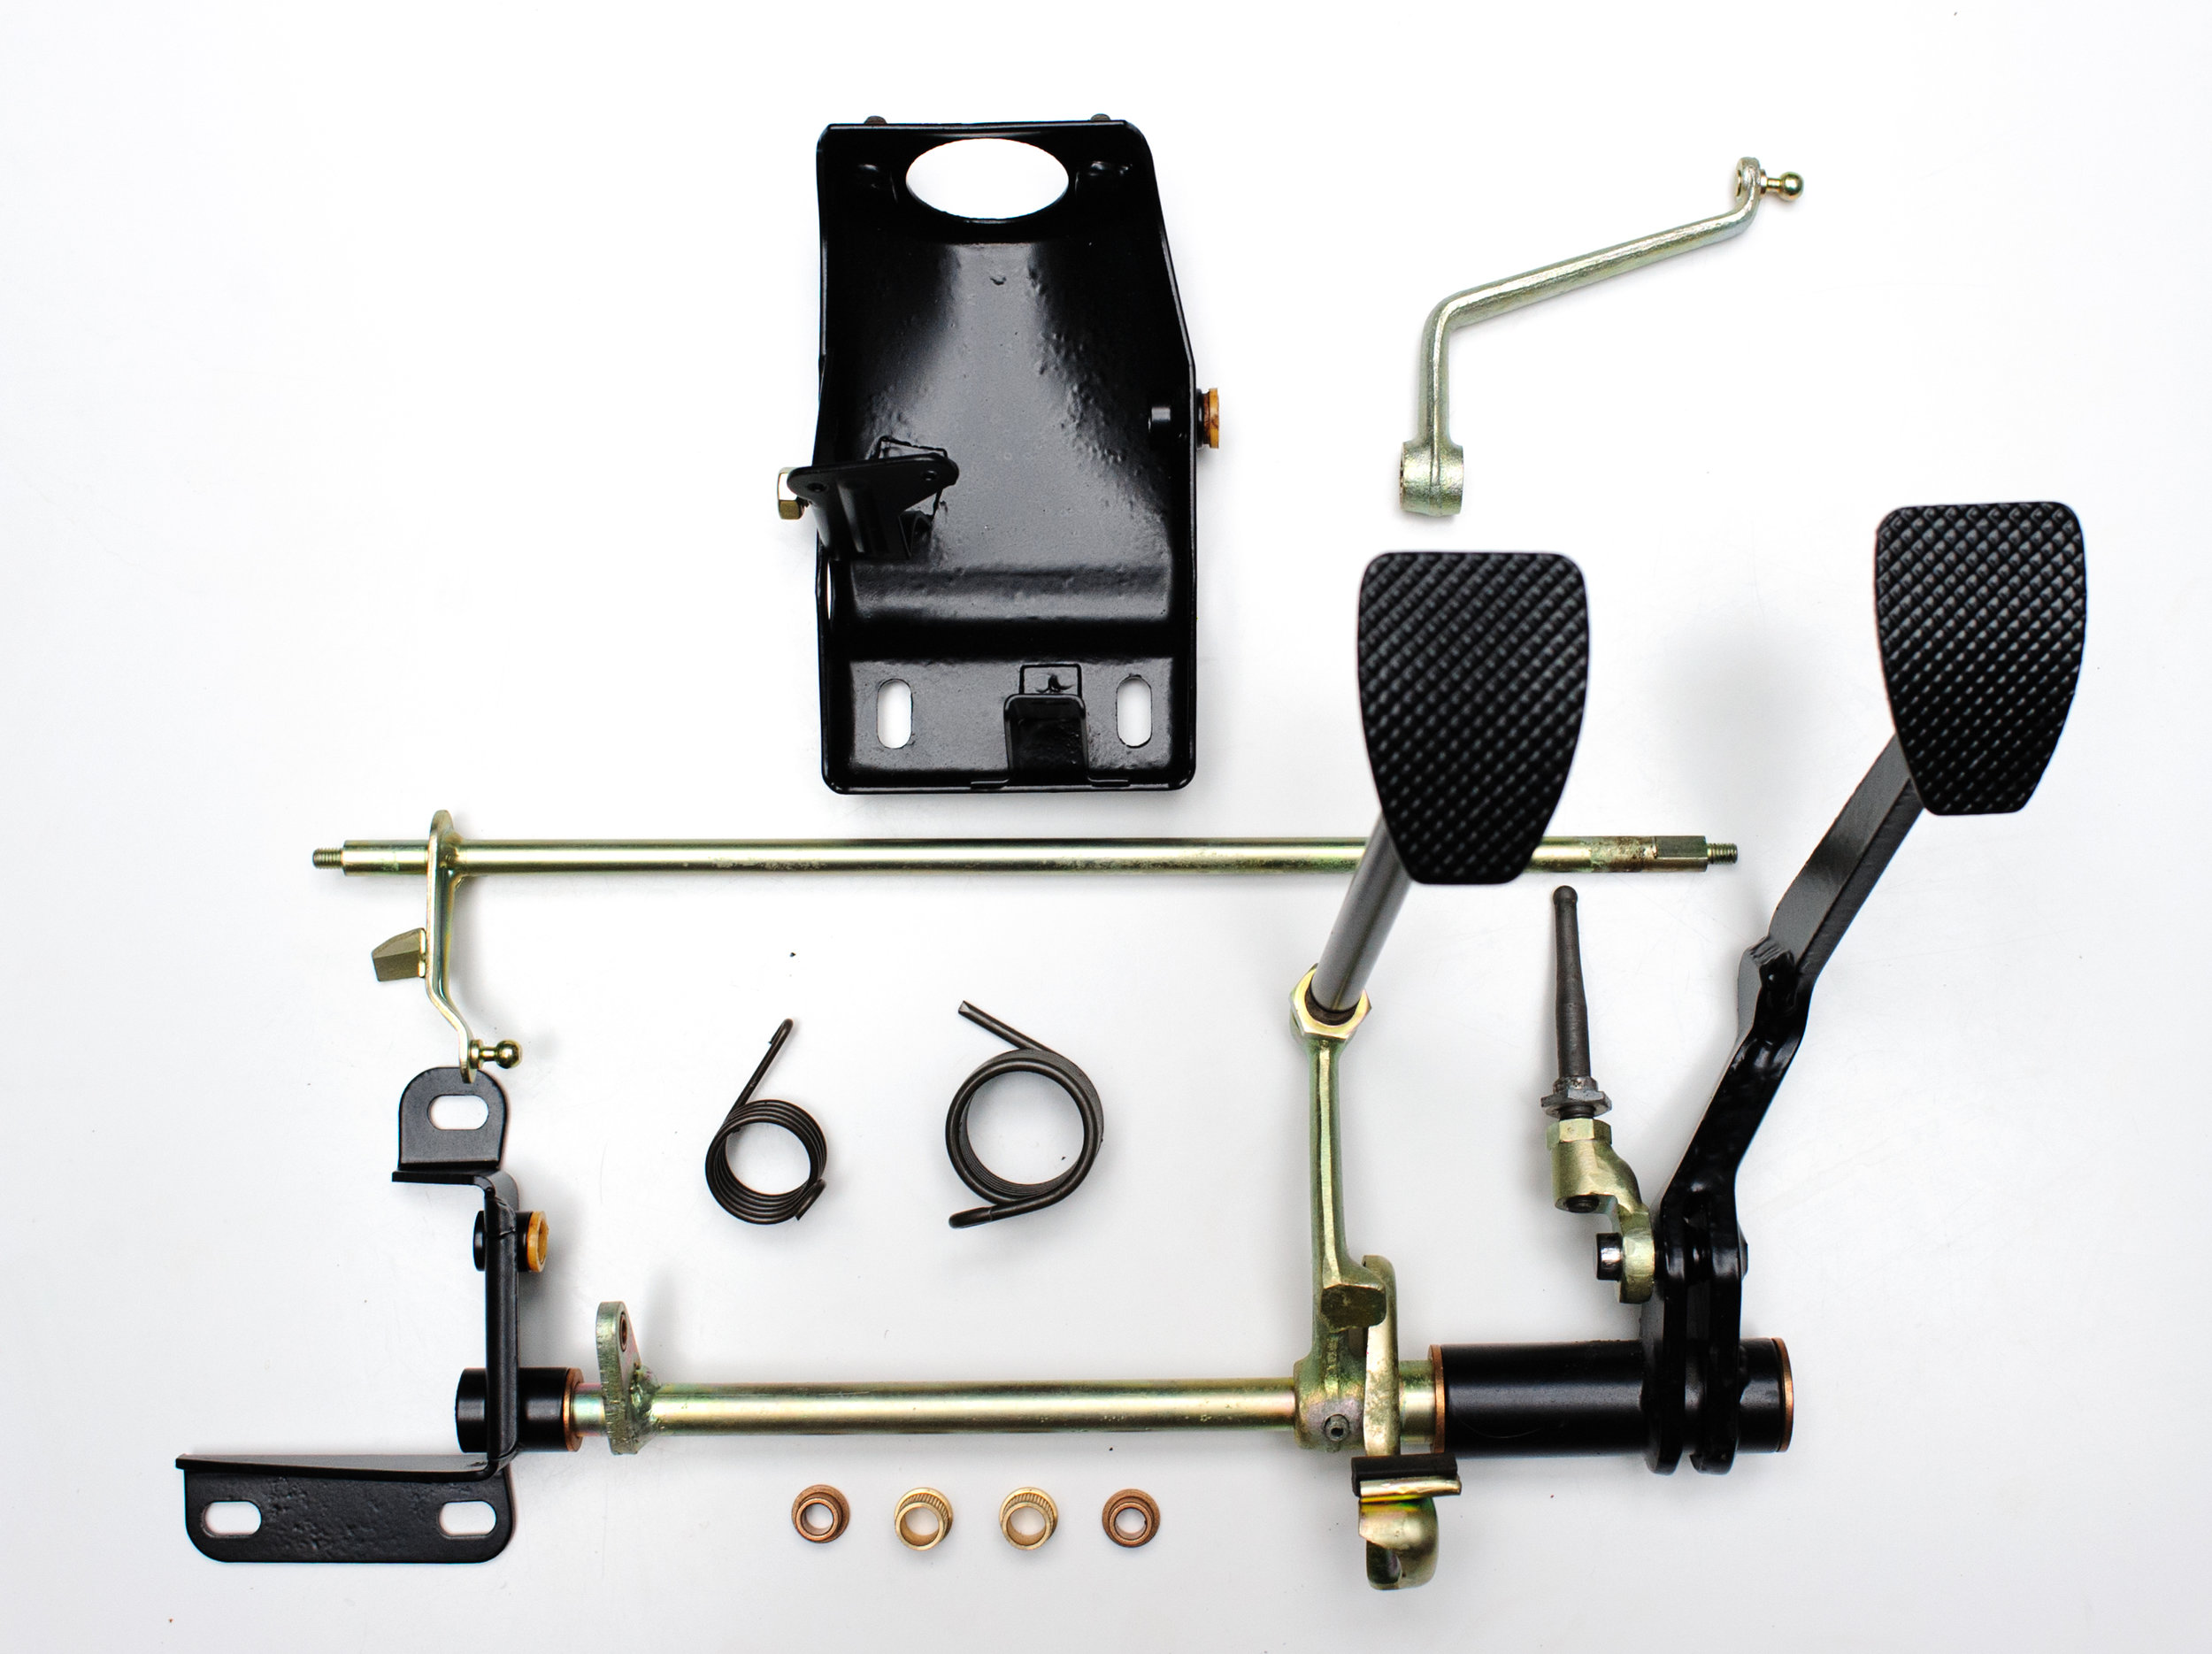
More lovely fresh painted / plated / otherwise refurbished bits ready to bolt on.
Here's the rufurbished pedal cluster. Being RHD it has some slightly weird and wonderful extension rods, to bridge the gap from the accelerator and clutch pedals to the centre tunnel (much simpler in the LHD version).
As well as the plating and paint, it has new bushes and springs.
Let's have some pedal photos:
As you know, the MFI pump has a solenoid which operates a fuel cut off. The principle is that, on a trailing throttle at higher revs, the unit stops pumping fuel into the engine. Anyone who has followed an MFI car on which it's not working (fairly common fault) will recognise the bangs, pops and occasional flames. Quite cool, but not especially good for the engine.
One component of the system is the "speed switch", which detects when the revs are above approx 1500 rpm. Above that level, when the throttle closes (detected by a microswitch), the MFI solenoid should energise and the fuel shut off. On the way back down the revs, below 1300 rpm the solenoid needs to de-energise to resume fuelling and prevent the engine from stalling.
The CDI+ unit from Classic Retrofit offers a (programmable) replacement for the speed switch.
There's a wire coming out of the CDI+ box:
Which needs to be connected to the microswitch + solenoid via a 40A relay, thus:

40A relays are readily available. Mine is a little grey Hella one which should really live in a Skoda:

I know what you're thinking, that looks crap and why did you choose that ugly relay? Answer: because it fits into an old speed switch case. Stealthy:

Output programmable via the CDI+ software:

I've tested the microswitch and solenoid, all fine, so I reckon we should be in good shape for working fuel cut-off.
It's all plug and play, no butchering of the loom required, so could easily revert. Thanks to Jonny (DDK-er and owner of Classic Retrofit who make the CDI+) for the help and exemplary technical support.
And that, in a nutshell, is the kind of mod I'm doing. Criteria:
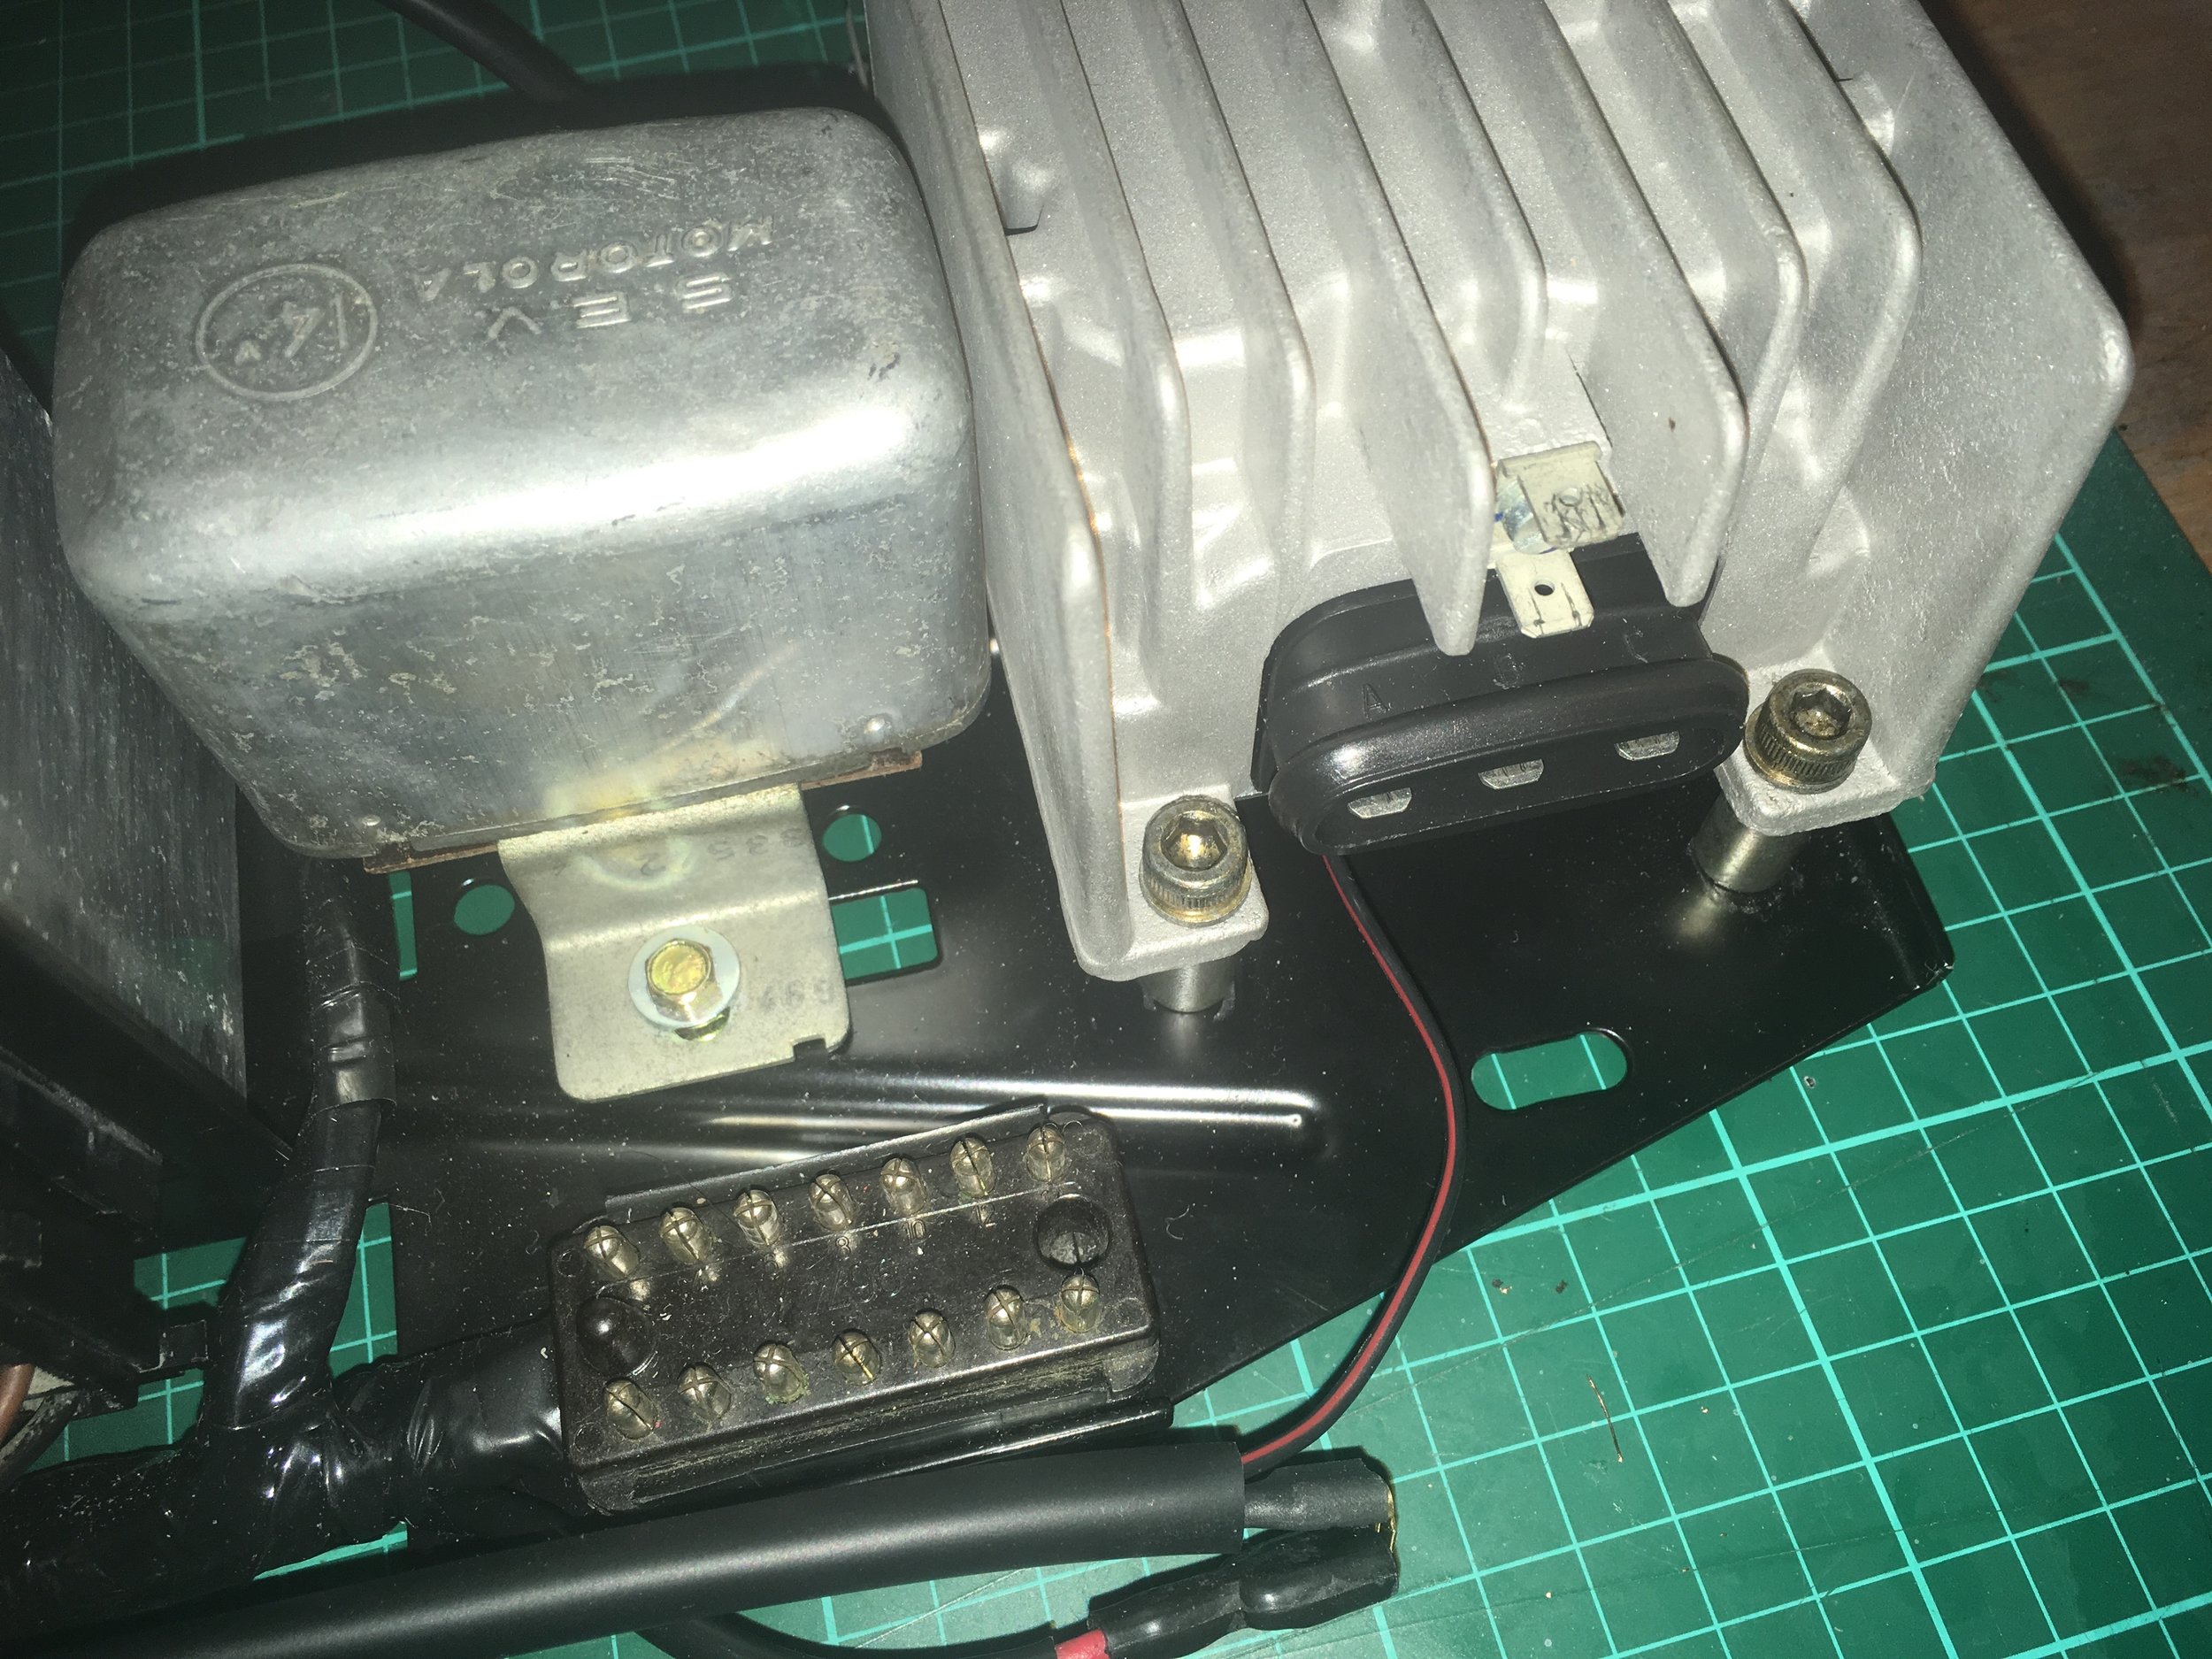
The next part of the electrical sort-out was the panel in the engine bay. The one with the CDI box, rectifier, couple of relays, "speed switch" etc.
Here's what came with the car:

Today it looks like this, which is quite nice but not the interesting part....

The interesting (to me) part is that I'm using a CDI+ box, having enjoyed good results with the one in my 69 car. The CDI+ is a CDI box replacement from www.classicretrofit.com; modern digital electronics and programmable ignition curve. I went for the Stealth version, built into a Bosch original case. I'm going a step further this time and locking the distributor, so the CDI+ is responsible for the advance curve.
For my car, the distributor is a Bosch 007. Standard advance curve for that is:

It's pretty easy to get the same curve into CDI+, as a starting point:

Please ignore the deliberate mistake - I've gone beyond the available adjust room for the amount of initial physical advance (hence my curve goes into the red area of the graph). I took the screenshot before I'd finished fiddling about.
Note also a few useful bells and whistles. On my other car I particularly like the soft limiter - much more civilised than the all-or-nothing mechanical limiter (spring in the rotor arm).
Next, a slightly strange job on the dashboard.
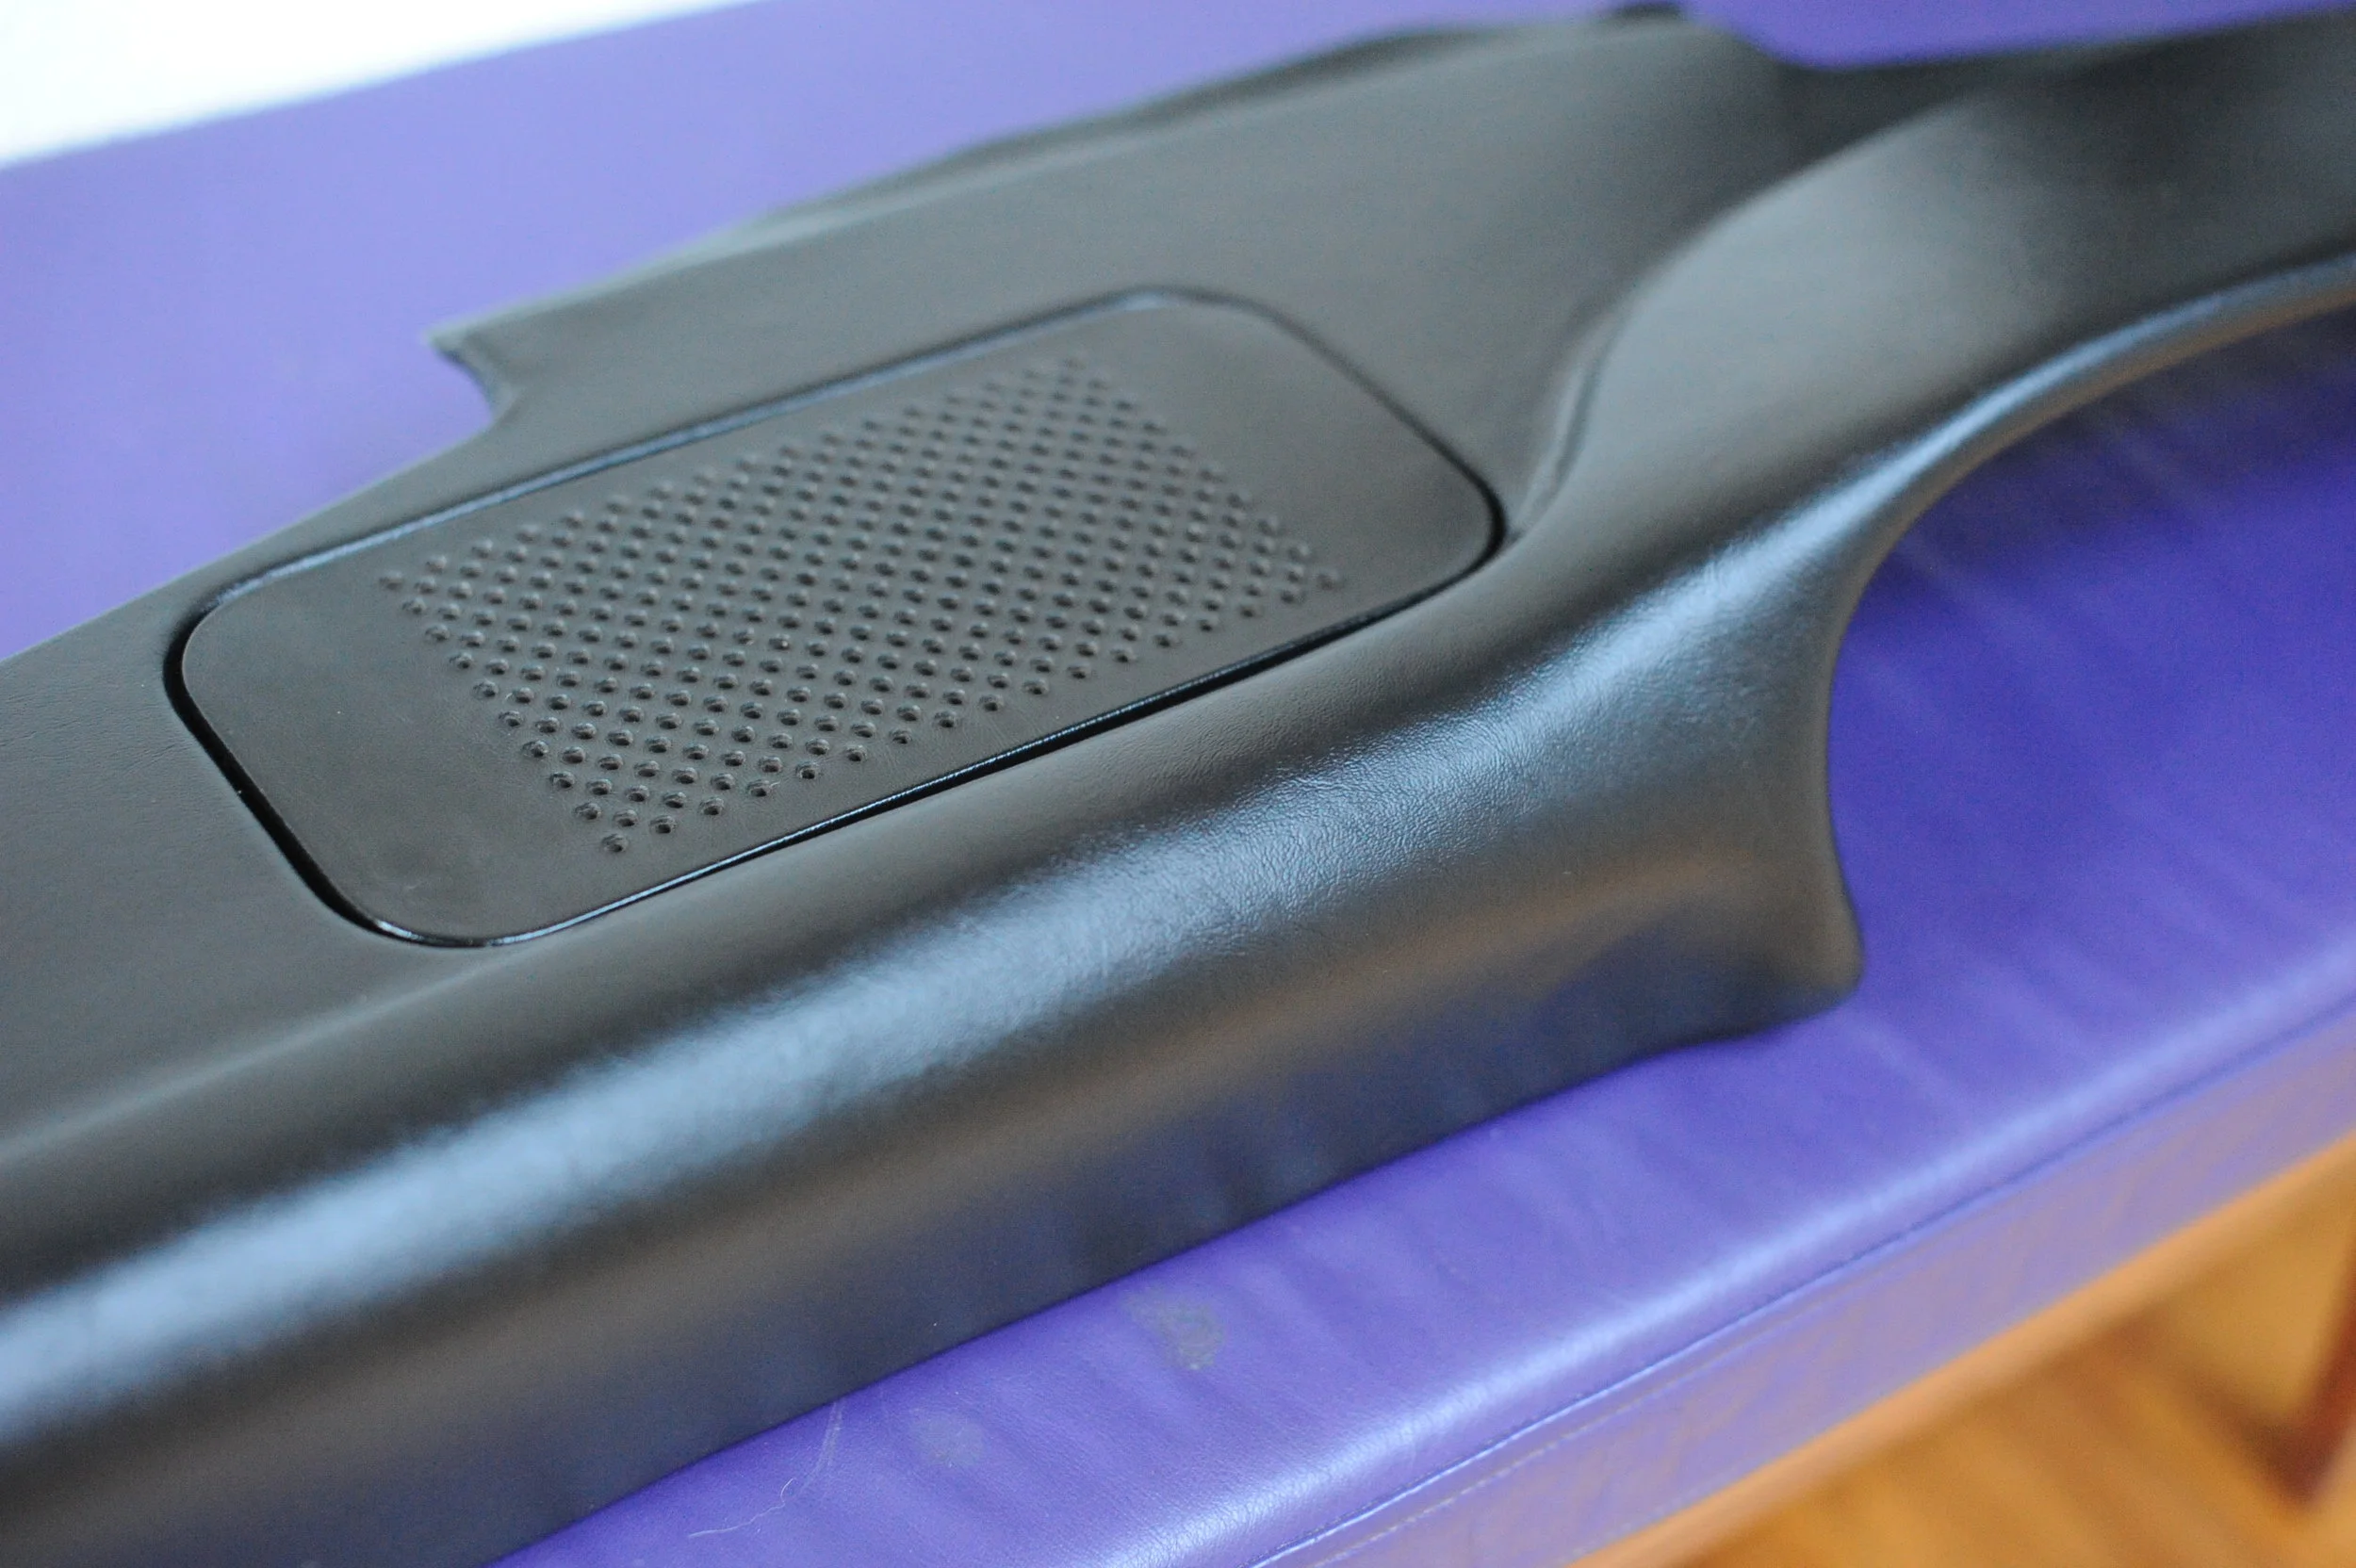
RHD dashes of correct quality were / are not available, so mine is being refurbished by the incomparable Garry at Classic FX
It seemed salvageable, the main problem being that the speaker hole had been filled in. It looked as if a previous owner had it reworked by a company that uses vacuum-forming type techniques to attach the vinyl - the many small holes are the clue.
Garry was not overly keen to make a hole that I (already earmarked as an annoyingly picky customer, for some reason ...) might suggest was half a millimetre out of position and throw a hissy fit. So he kindly let me take some measurements from another dash, following which I measured many times, cut once, and ended up with a hole that seems to fit my nice original speaker grille. Dremel with router bit was the tool of choice.
After which my dash went off to be re-covered. Here are a couple of pics of the finished article.
With many thanks to Garry.
There's not been much progress, but I have spent many a happy hour sorting out the wiring loom.
The car's original loom was included when I bought it. Looked like this:
Hmmmmm....
There were various hacks and bodges, with the fuse panel area being particularly hideous. The original fuse banks had been replaced with blade fuses, in a slightly agricultural style:
This might not be everyone's idea of fun, but I've found it immensely satisfying to faff about very slowly at my workbench sorting it all out.
The front loom is now done, including a bench test with switches, headlights, indicators, wiper motor, heater fan etc attached.
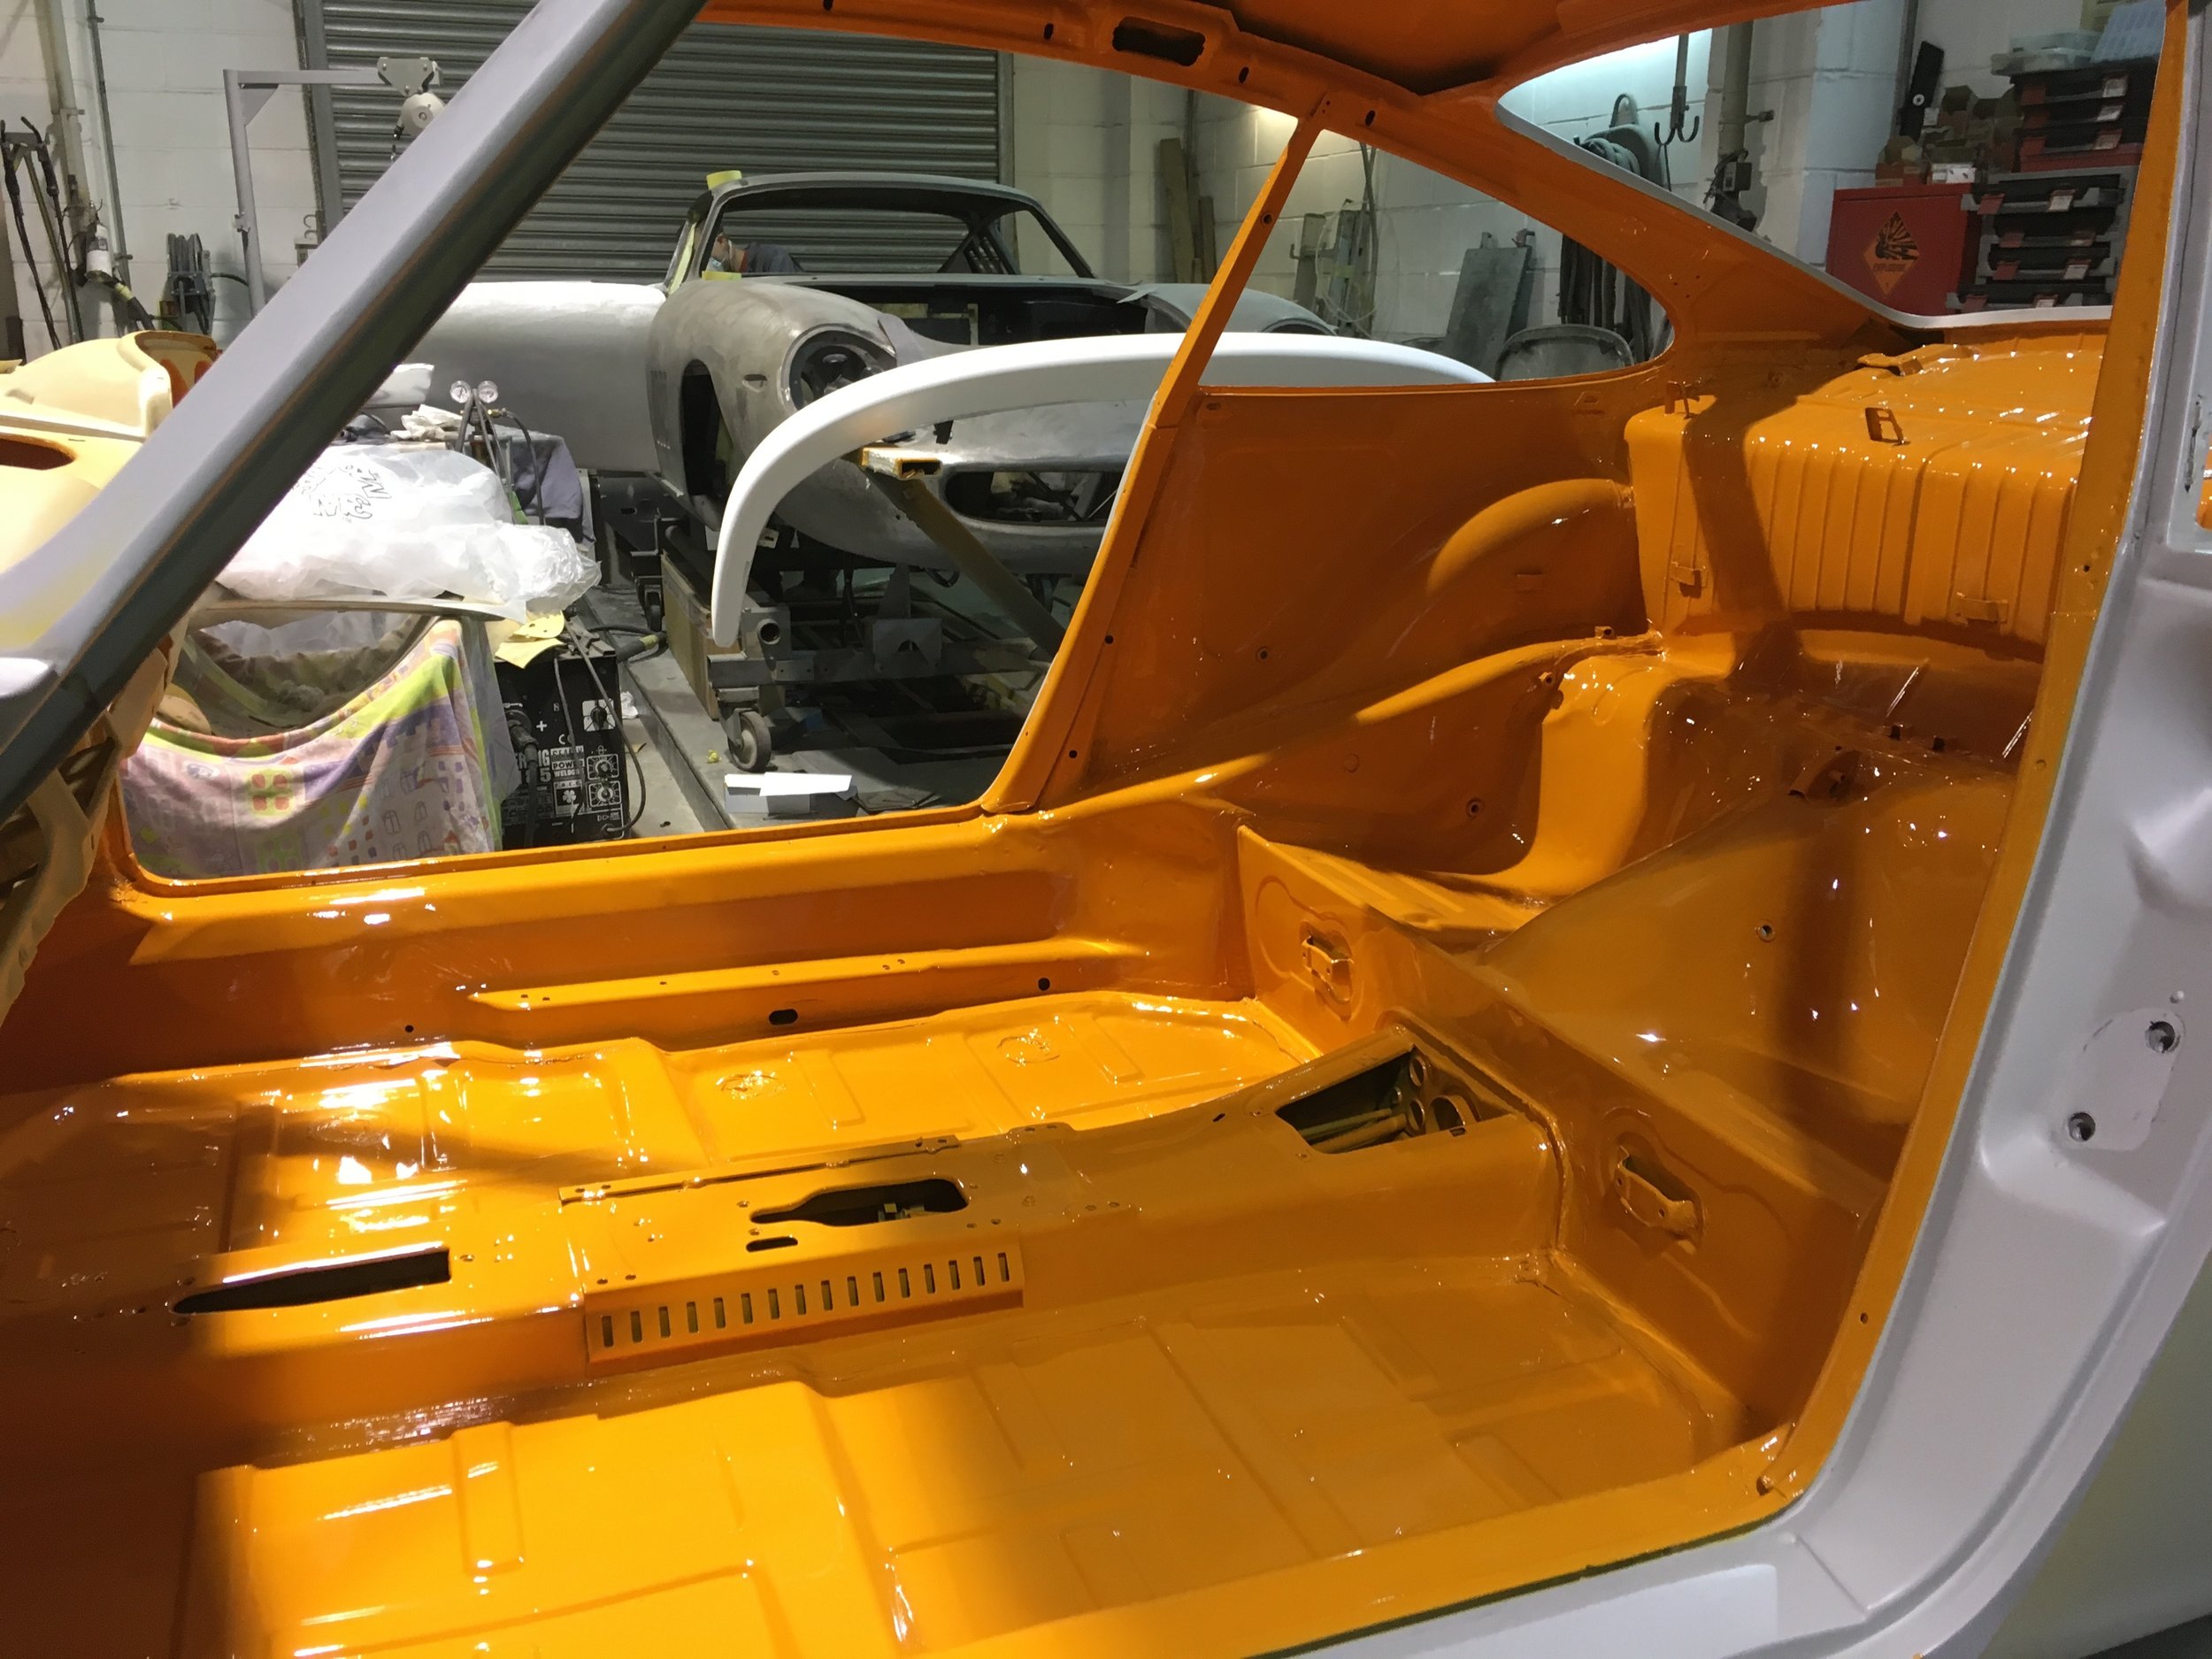
But only on the inside, for now. It's going to be quite orange.
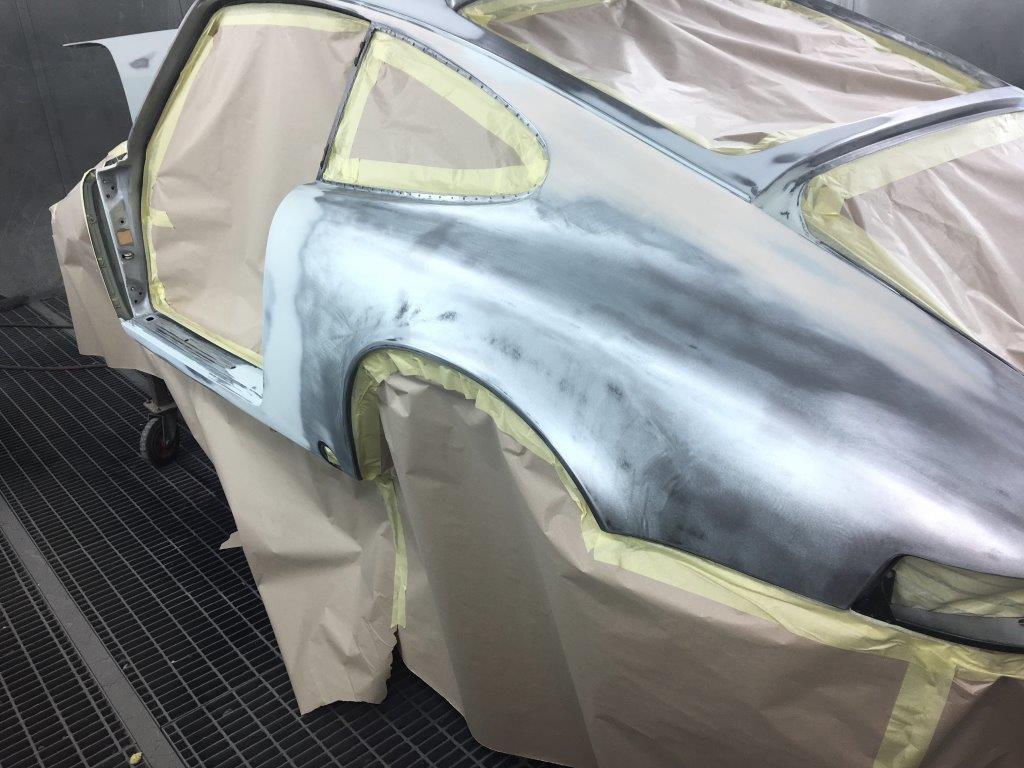
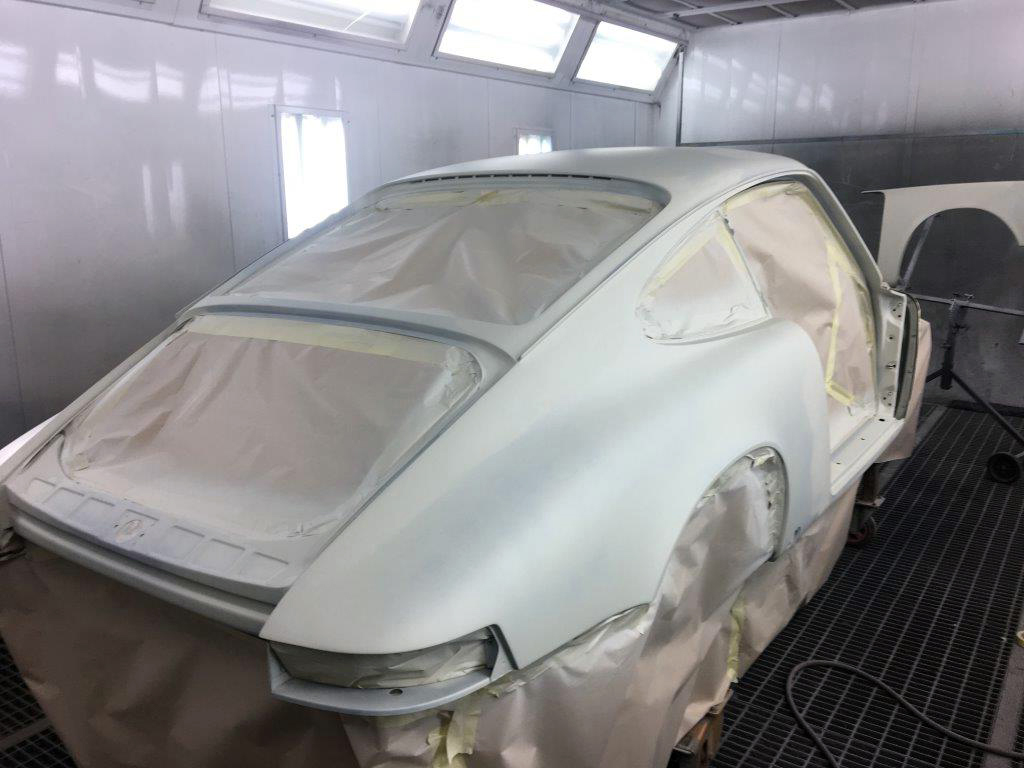
The paint is a custom mix. We found that the manufacturer's spec for my car's colour code (Signal Orange) was a really good match to my luckily-preserved original paint area (on the LH A-post, was preserved under the paint code tag in fact). But we needed to darken it very slightly to get it spot-on.
The photos are a bit deceptive - the colour is more orange, less yellow in real life and in daylight. Also it's not quite as glossy as it looks under the lights.
Again, based on reference photos of several original-paint cars, I asked Steve to replicate the factory stonechip finish. I'm very pleased with the way it's turning out.
The factory finish for seam seal was somewhat erratic and usually quite messy-looking.
For the areas that would have had factory sealant, I asked Steve to replicate the finish achieved by a production worker eager to knock off for a hearty lunch with free company beer. Other seams were also sealed, but more neatly.
I popped in at the weekend to discuss and agree textures of stonechip and seam sealer.
After my car, next in the queue for the DC magic is something properly exotic (Ferrari 275 GTB):
The main place I'm posting info about this restoration is the UK forum, DDK. http://www.ddk-online.com/phpBB2/viewtopic.php?f=28&t=48740
One very kind and knowledgeable DDK-er pointed out a bit of a cock-up. My fault, I did know about this detail, but had forgotten somewhere along the line.
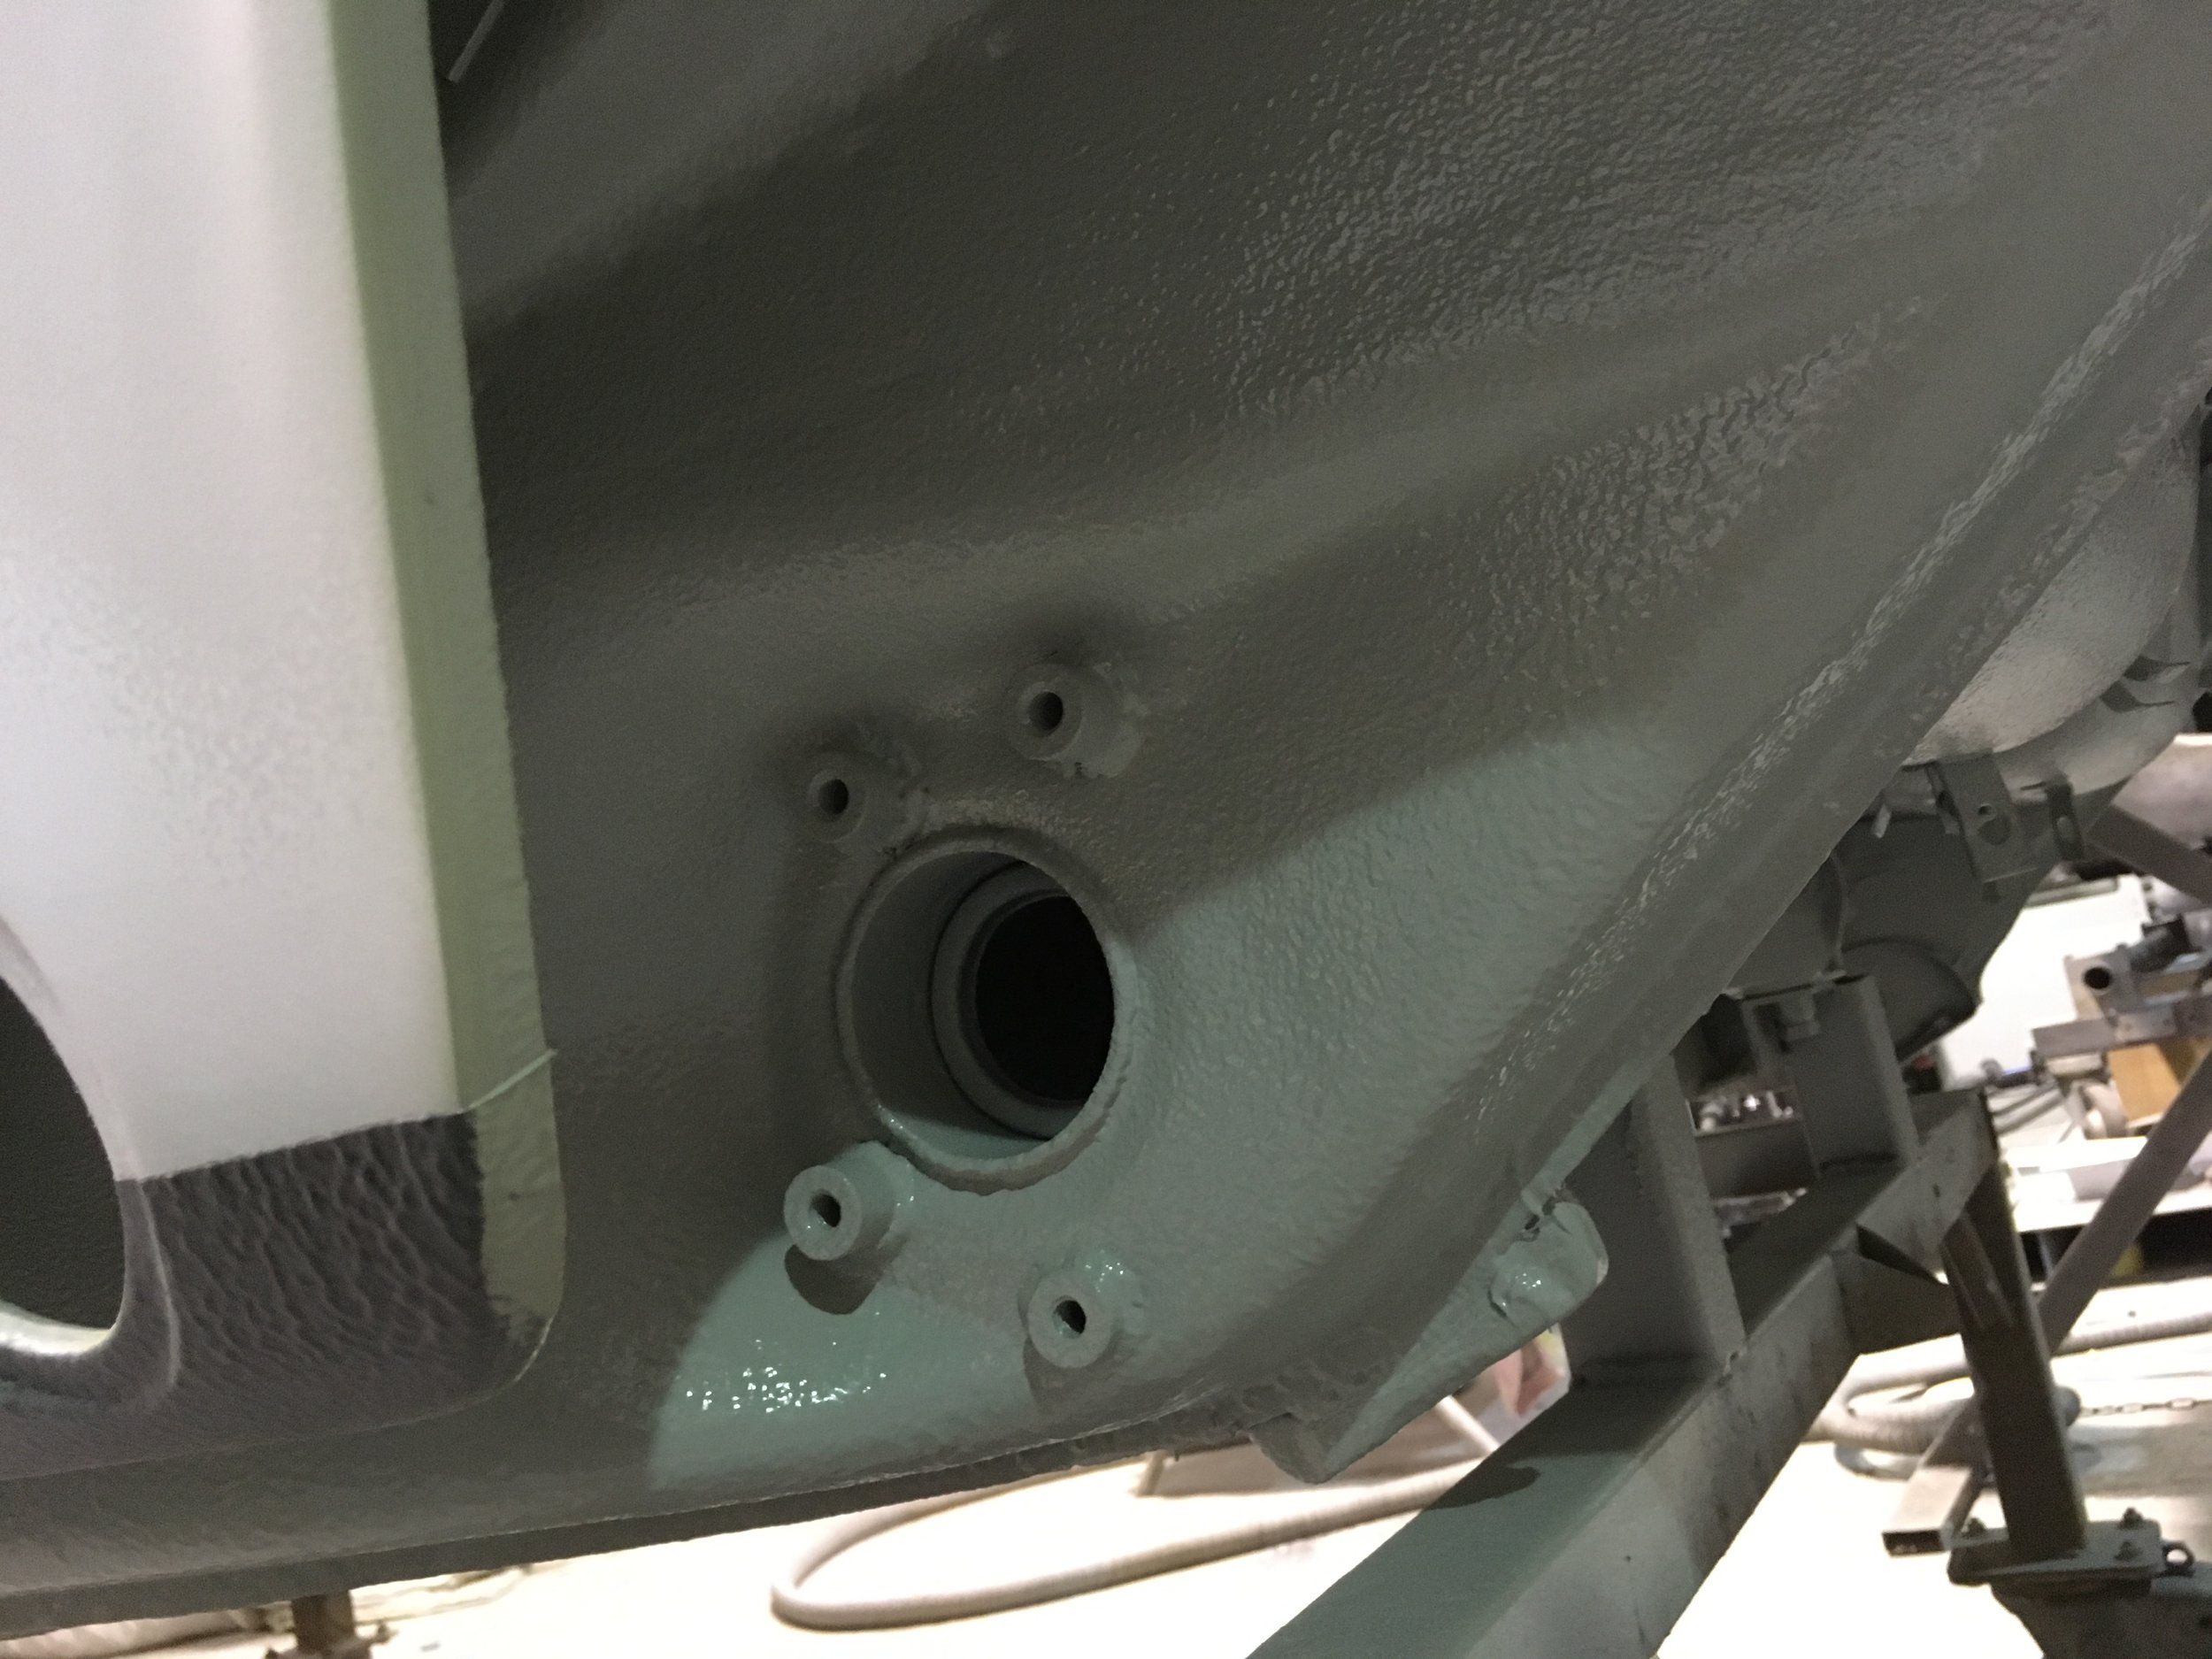
To elaborate, what's wrong with this picture? (my car):

Clues from some relevant reference photos of 70/71 cars. With thanks to Giovanni Favelli and David Conklin.


Yep, the cock-up is...
.... the highlighted drain holes are not correct for a 1970 car. I'm told they were introduced during the '73 model year.
You all knew that, right?

Now fixed:
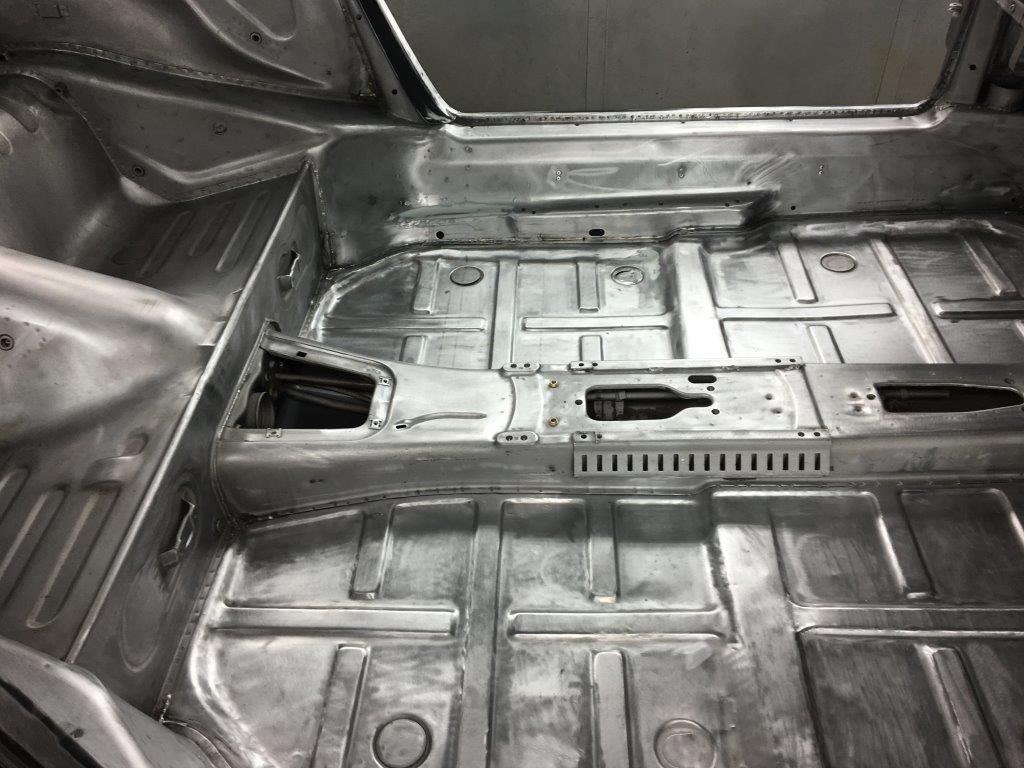
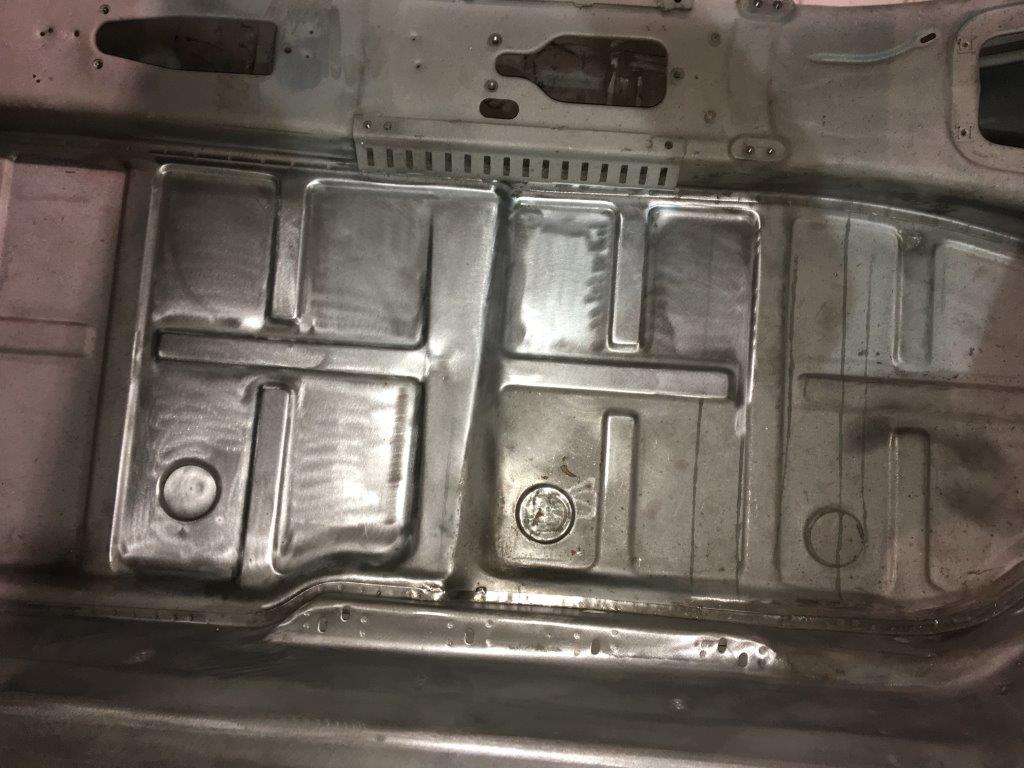
Everything (including the new Porsche panels) has gone back to bare metal as the first stage of paint prep.
A skim of filler in places, but not tons of the stuff.
And some epoxy primer. Lovely and tough, offering much better protection against corrosion than was usual in 1969.
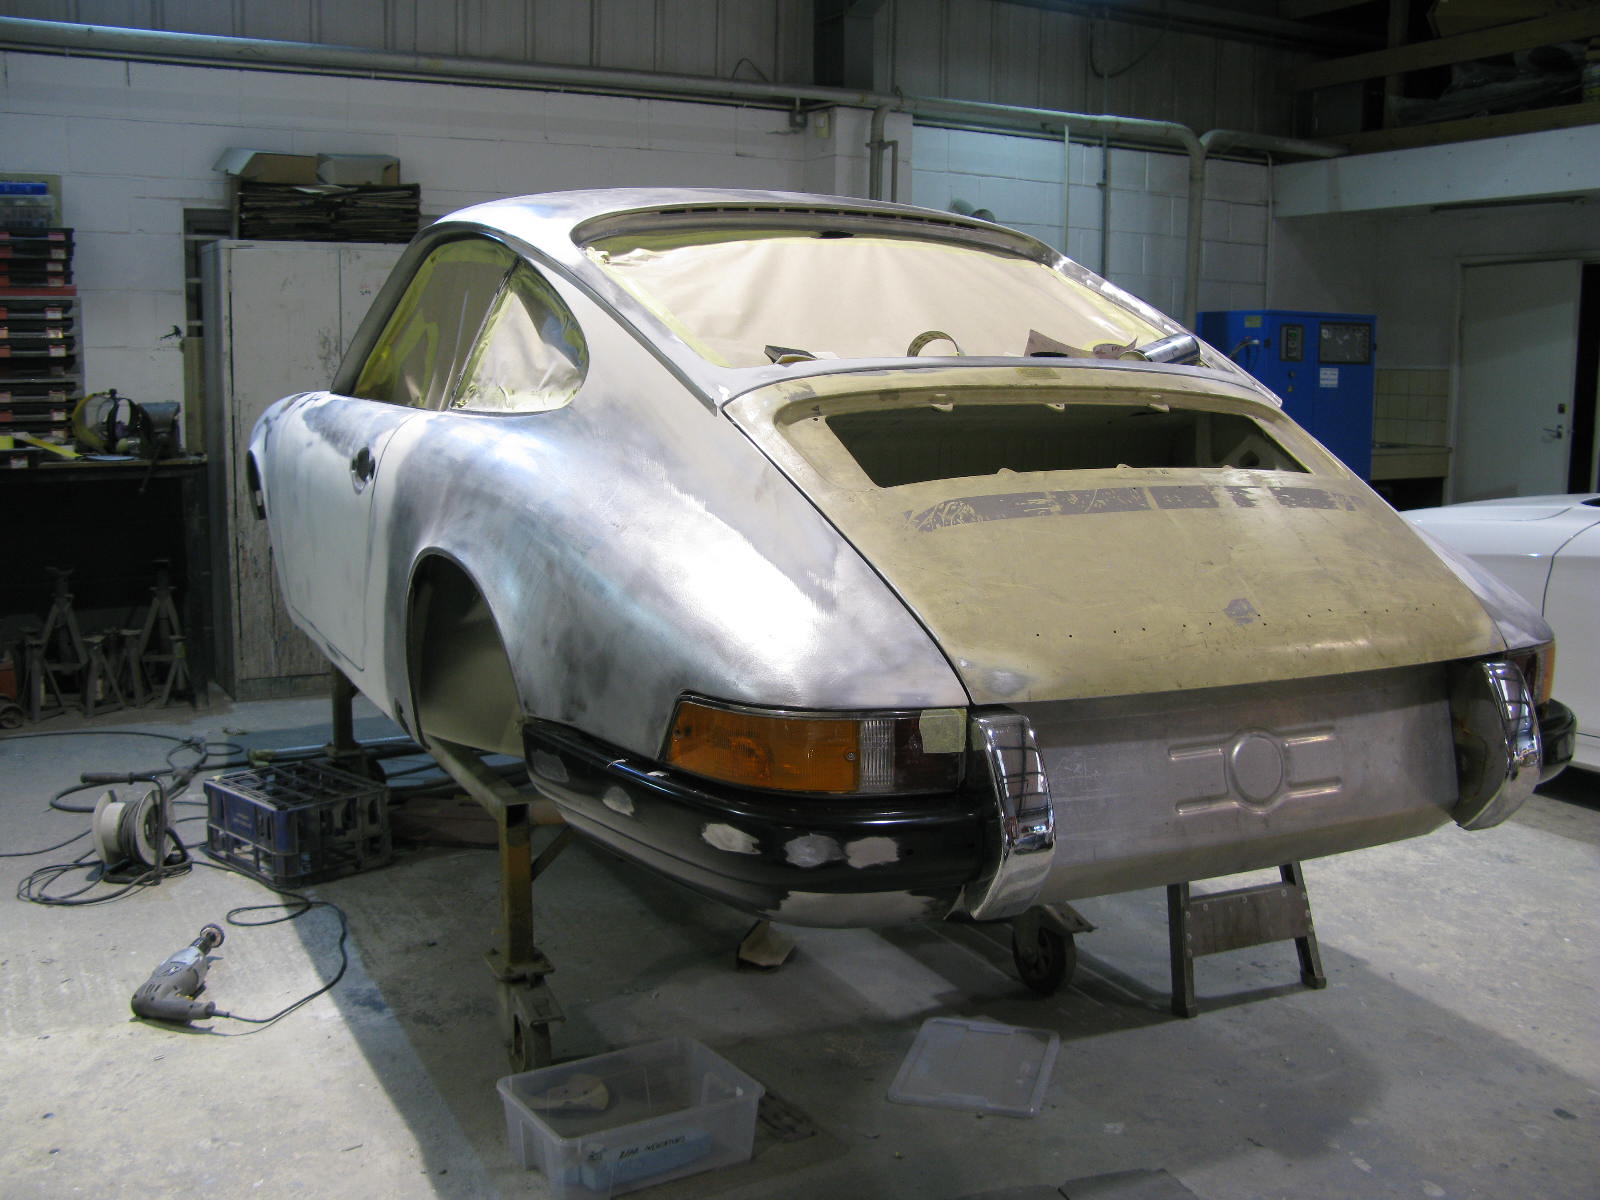
Barry took a little drive over to DC, to fit the modified rear bumpers and number plate panel. Fit was good, only minor tweaking required, and the end result is rather nice I think.
Here are a few pics of the shell in its current state.
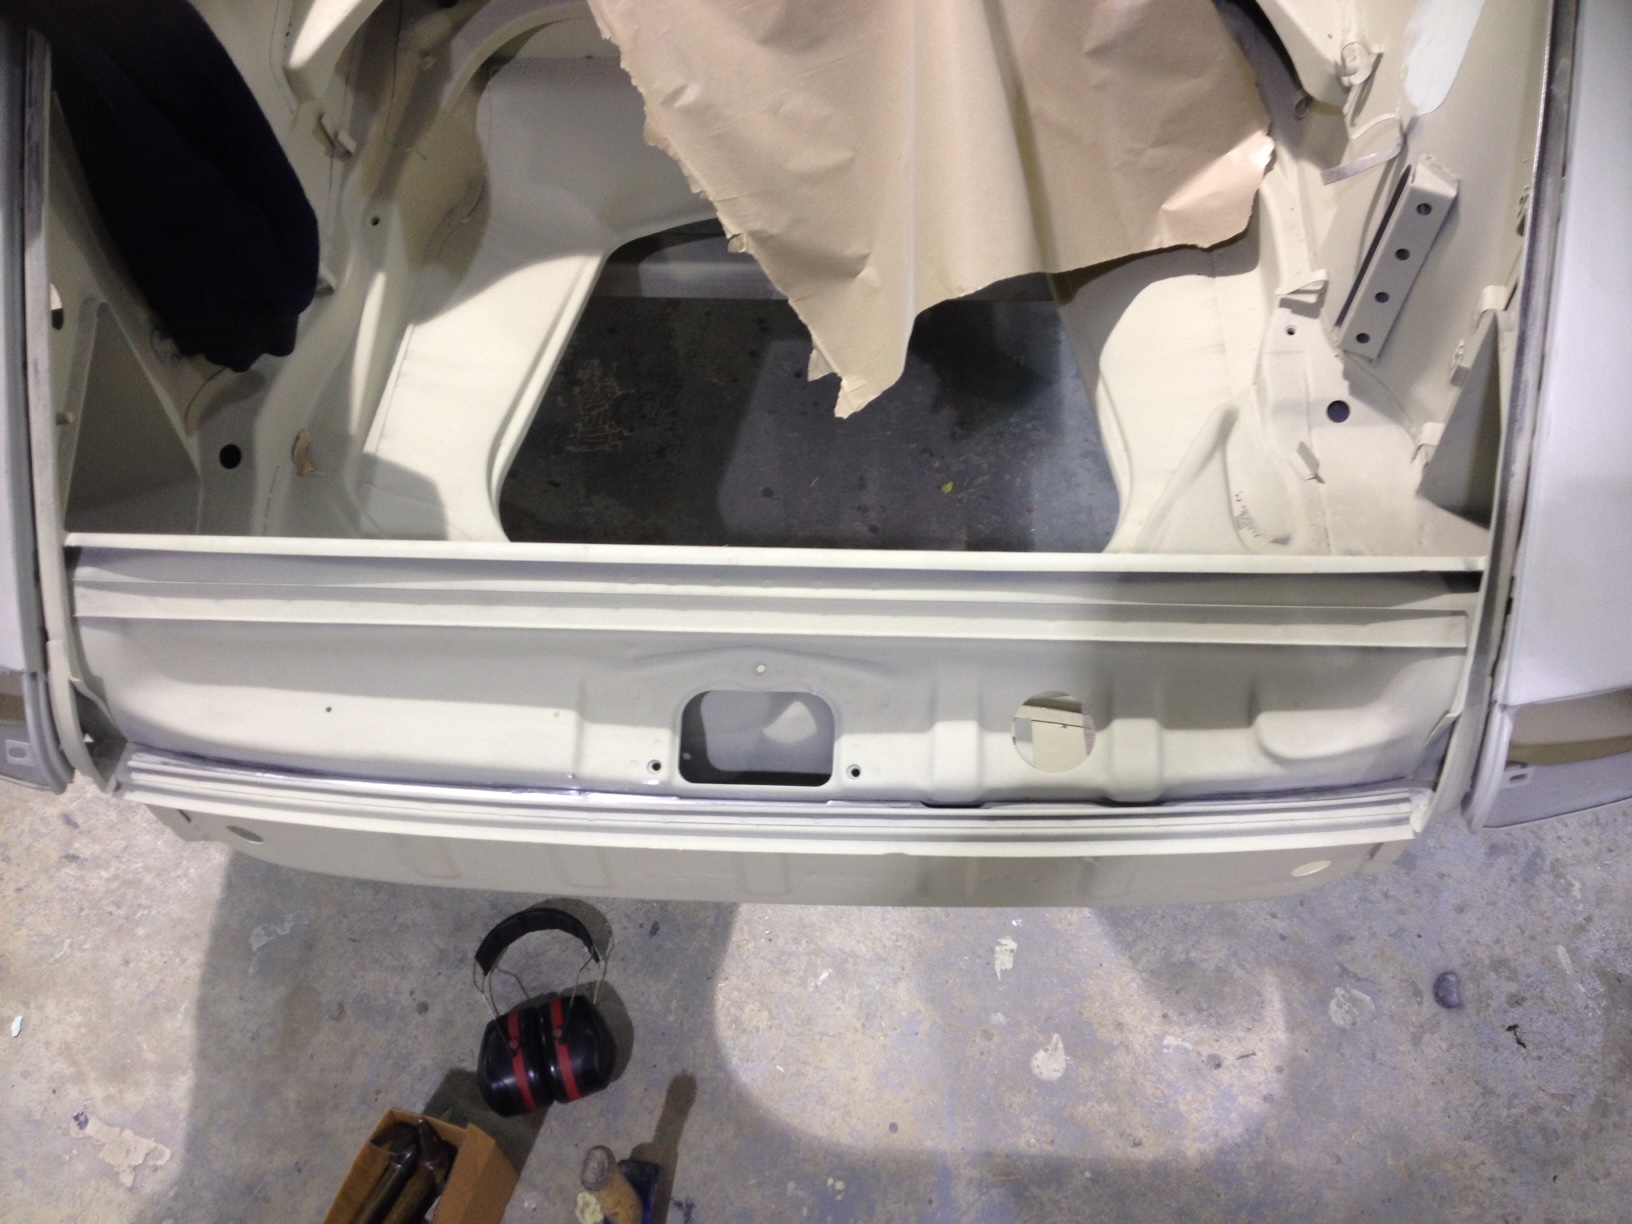
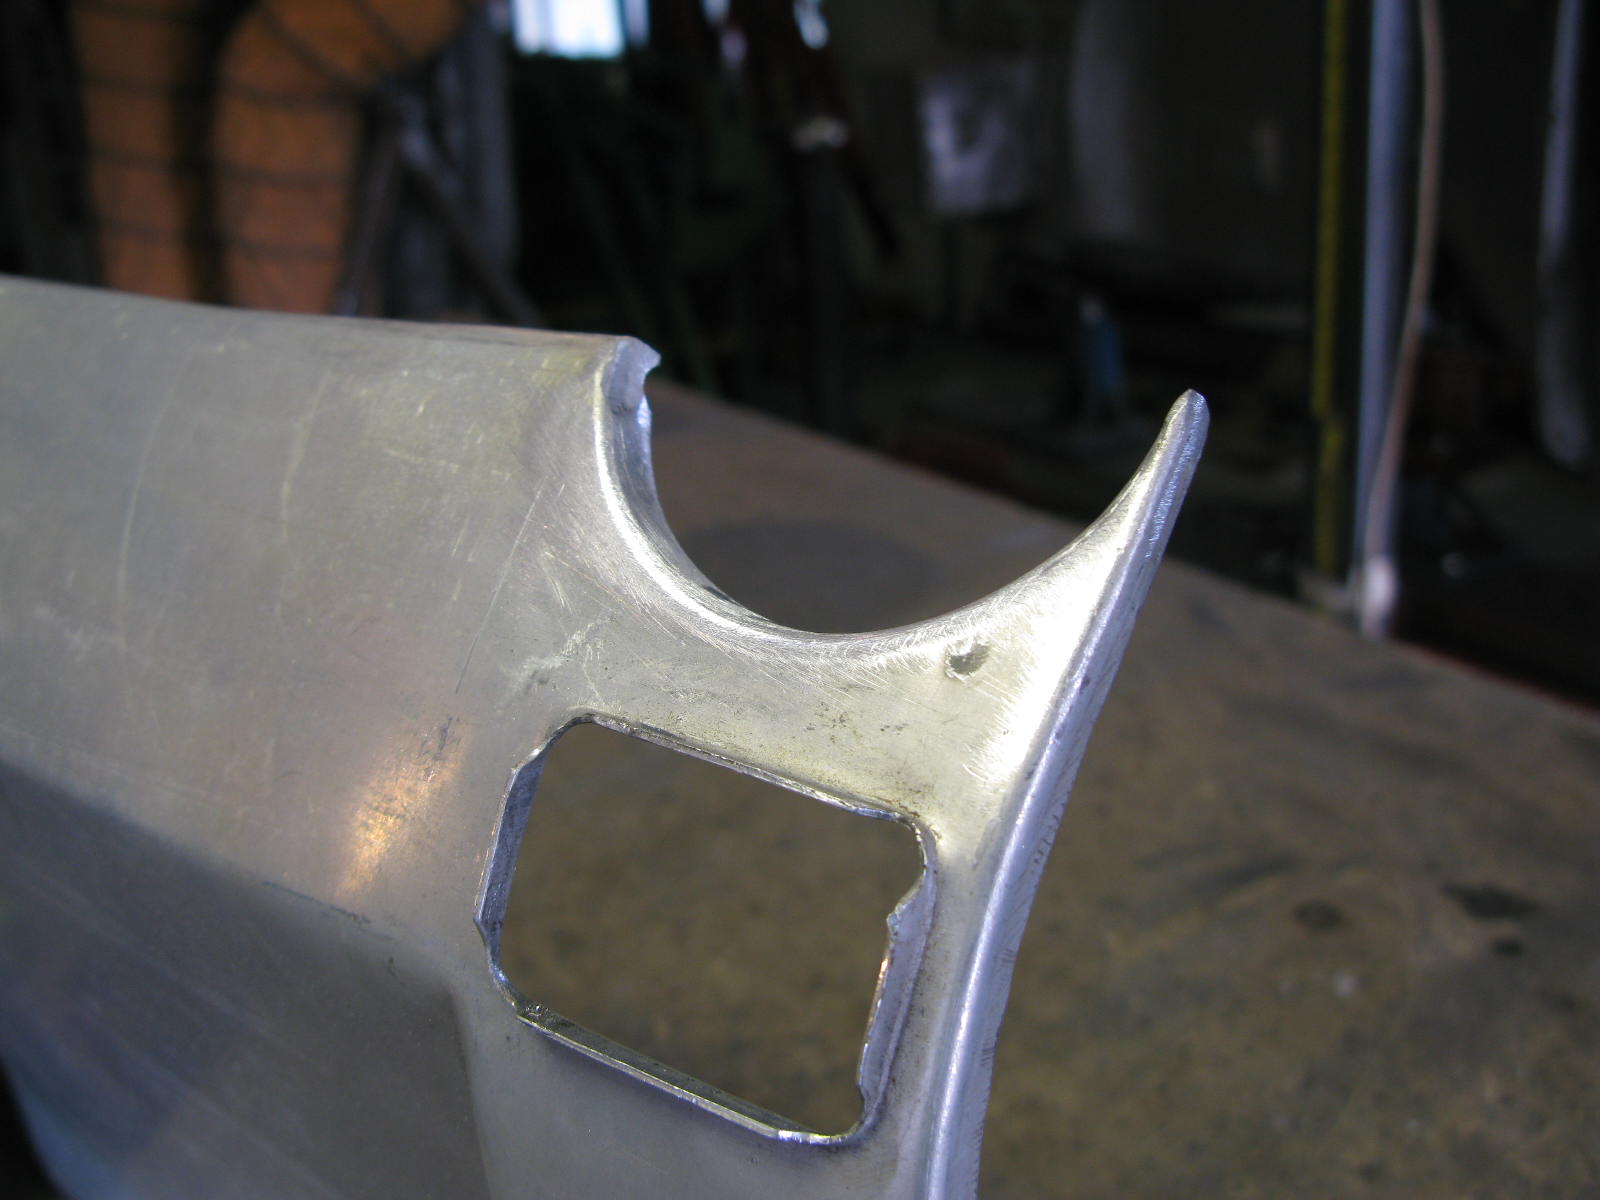
The 1970 S had an aluminium deck lid and number plate panel. Deck lid already sorted, but the number plate panel needed some work. I bought a cheapie Restoration Design aluminium version to use as a starting point, and Barry set to work with the TIG welder.
Barry's comments on his work on this part:
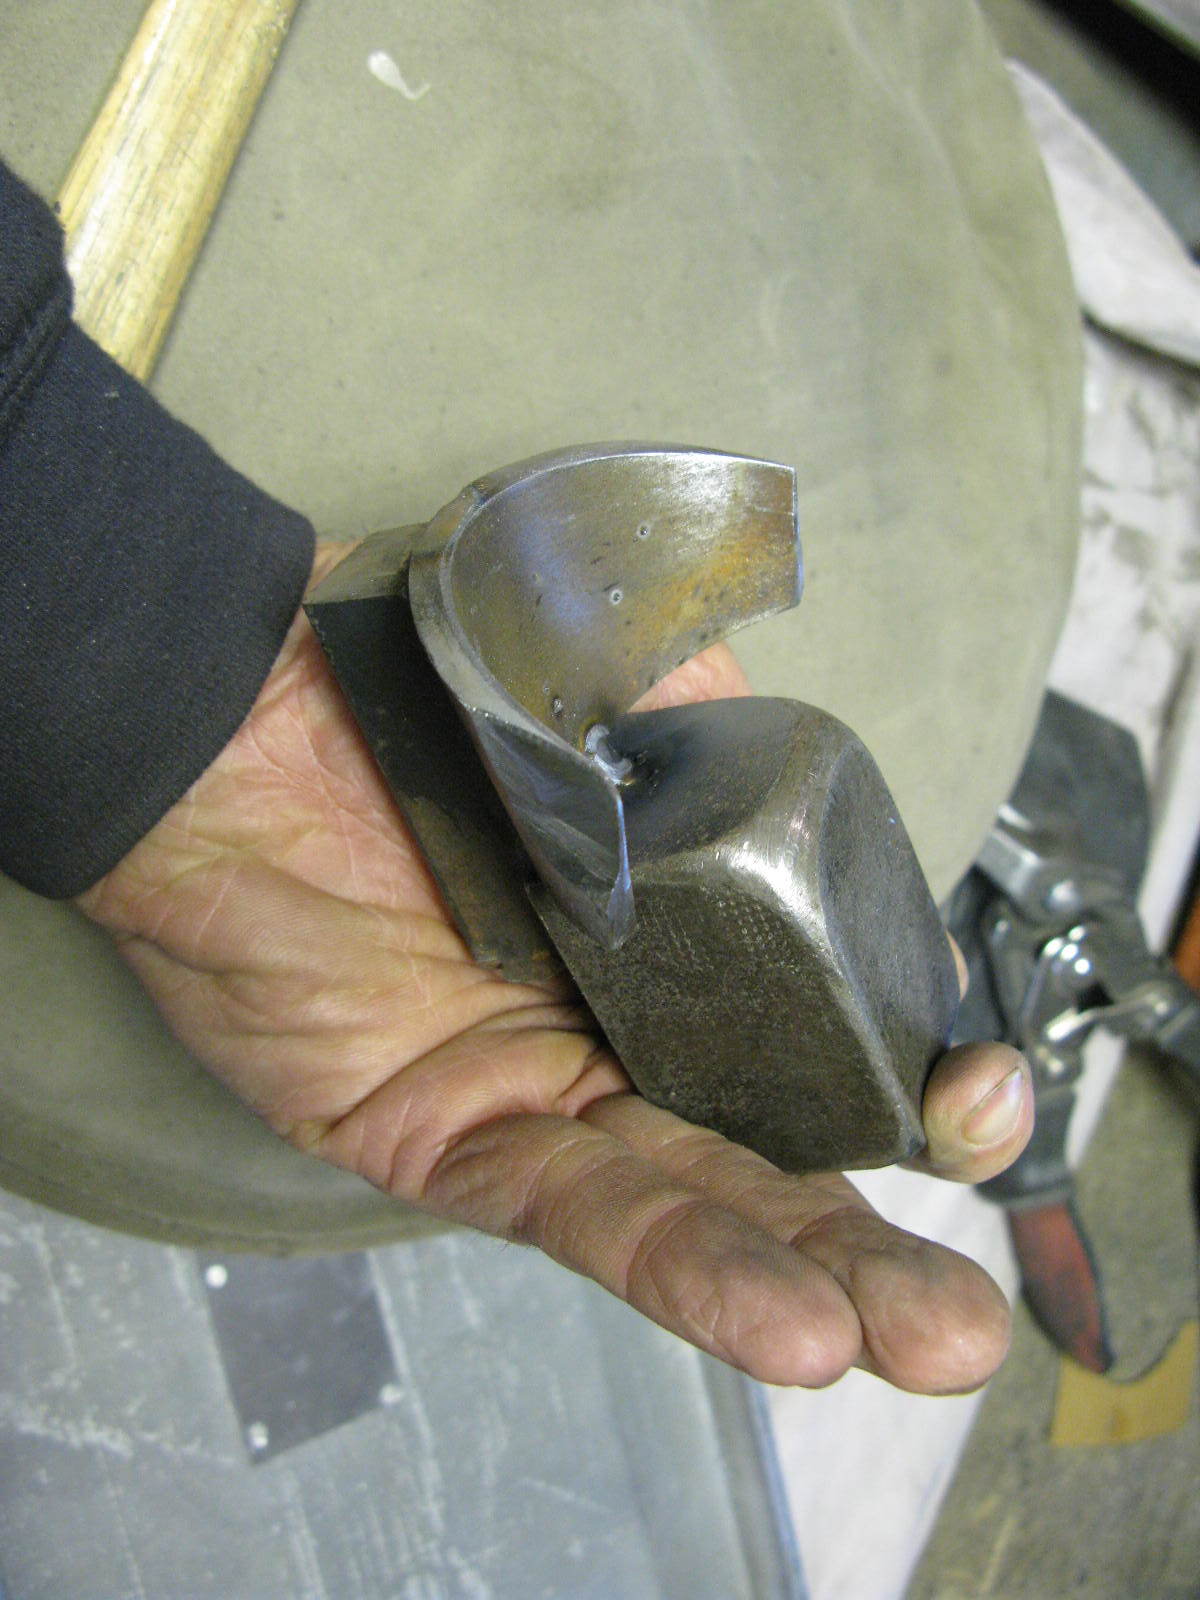
Following the supplied template, I set about making the twin exhaust cut-outs.
There was no way I'd be able to free-hand these on an already made panel with the cut-outs right on the outer edge. After a bit of thought, I came up with a one-off tool that would do the job. In fact I did end up augmenting the tool with an additional dead-weight just to give a bit of stability.
I then used the tool to mark the fold and cut lines, and removed the metal not needed. The flanges were then formed. These terminated right on the vertical flange and would have been a weak-point, so these terminations were TIG-welded solid before sanding back out to blend in everywhere. I also TIG'ed the top seal holder on where the factory welds had already failed, as well as reinforcing various slip areas. The panel in places was paper-thin, so this was not a straightforward process!
With the main panel modified, I then pondered how to fix it to the two bumperettes. As specified, the exhausts run right through the existing brackets (which by now had been removed). I elected to use some thicker aluminium and fabricated a couple of brackets which were TIG welded into place. These have worked out very well, and have obviously now been drilled as appropriate.
The panel itself also needed quite a lot of basic fettling. They are pretty awful, but cheap and can be salvaged.