Fettling

Here in the UK we've had various COVID lockdowns, and more generally life has been far from normal. When regulations have permitted, the orange car has been tested and fettled. Those last 5% (2%???) jobs make a big difference.

As a wise man once said to me: at some stage in a restoration the car starts to feel together, and you come back from a drive with a snag list which is a bit shorter than last time. Then, one day, you realise that the remaining jobs are trivial / no more than those waiting to be done on the "Proper" cars. At which point your restoration project is, by definition, now a Proper Car.

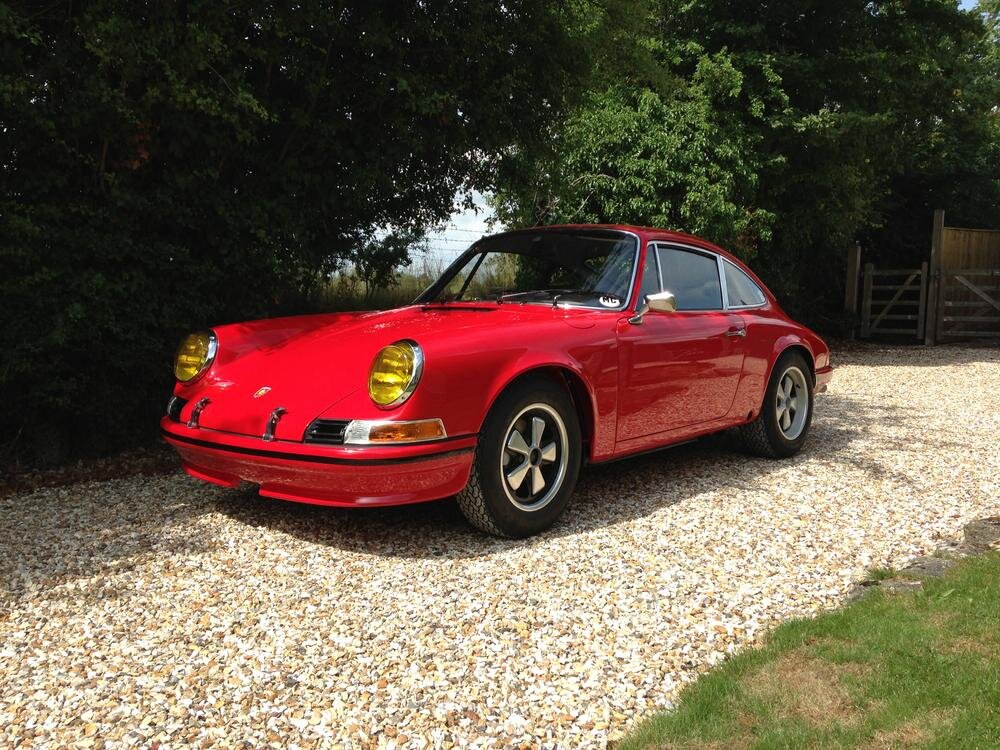
Looks fairly proper, I would say:

1970 Porsche 911S

Too many little tweaks to remember, but off top of head:

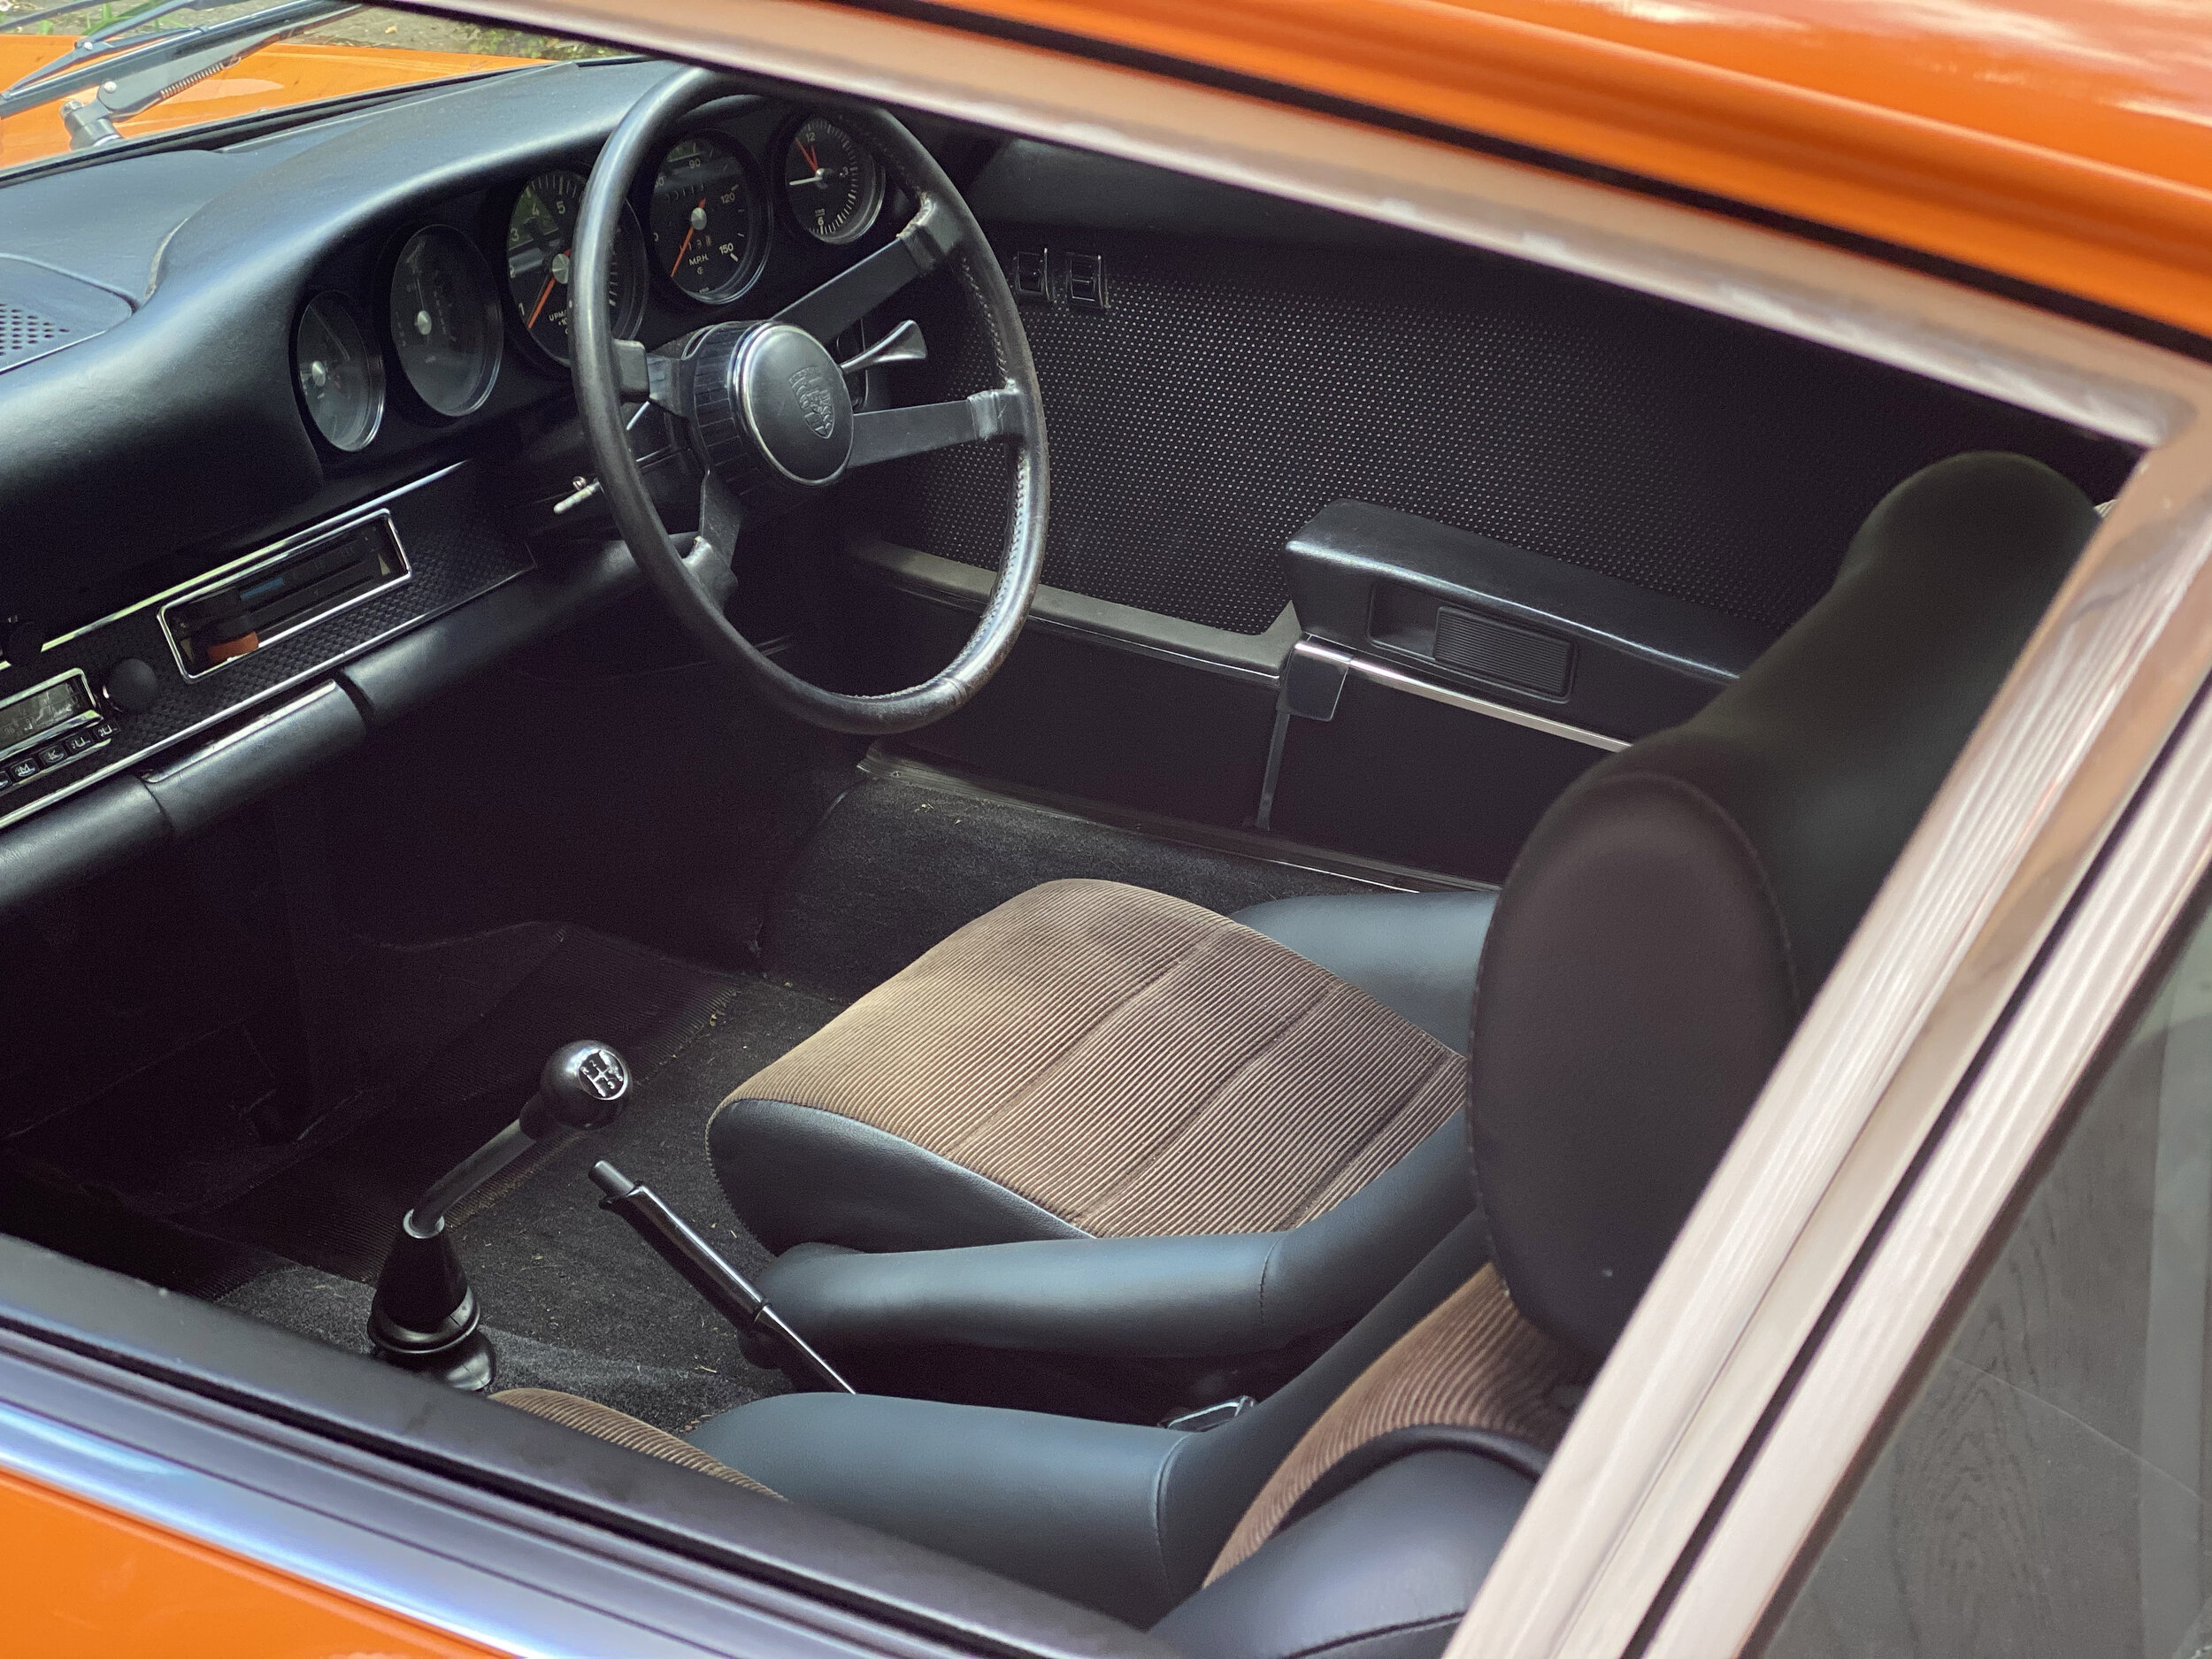
  1. Seat and pedal positions. Obviously make a huge difference to how it all feels...
  2. Brake fluid. While building, and for initial testing, I used silicone brake fluid. Mainly because it doesn't eat paint, and I was pretty sure something would leak (it did). Now flushed through and swapped to proper fluid, carefully re-bled etc. Pedal feel and effectiveness now very decent.
  3. Tyres. For a while I used the Avon CR6ZZ set destined for my '69 car. Now Pirelli CN36s. I think the Pirellis suit this car better. They feel slighly less stiff.
  4. Mirrors. I had intended to leave the car side-mirrorless, as it was originlly which I know from the 1970 movie of the car at Eric Clapton's house. But have now added Durants both sides, with the convex glass modification on the passenger side. I think it looks better, certainly feels better.
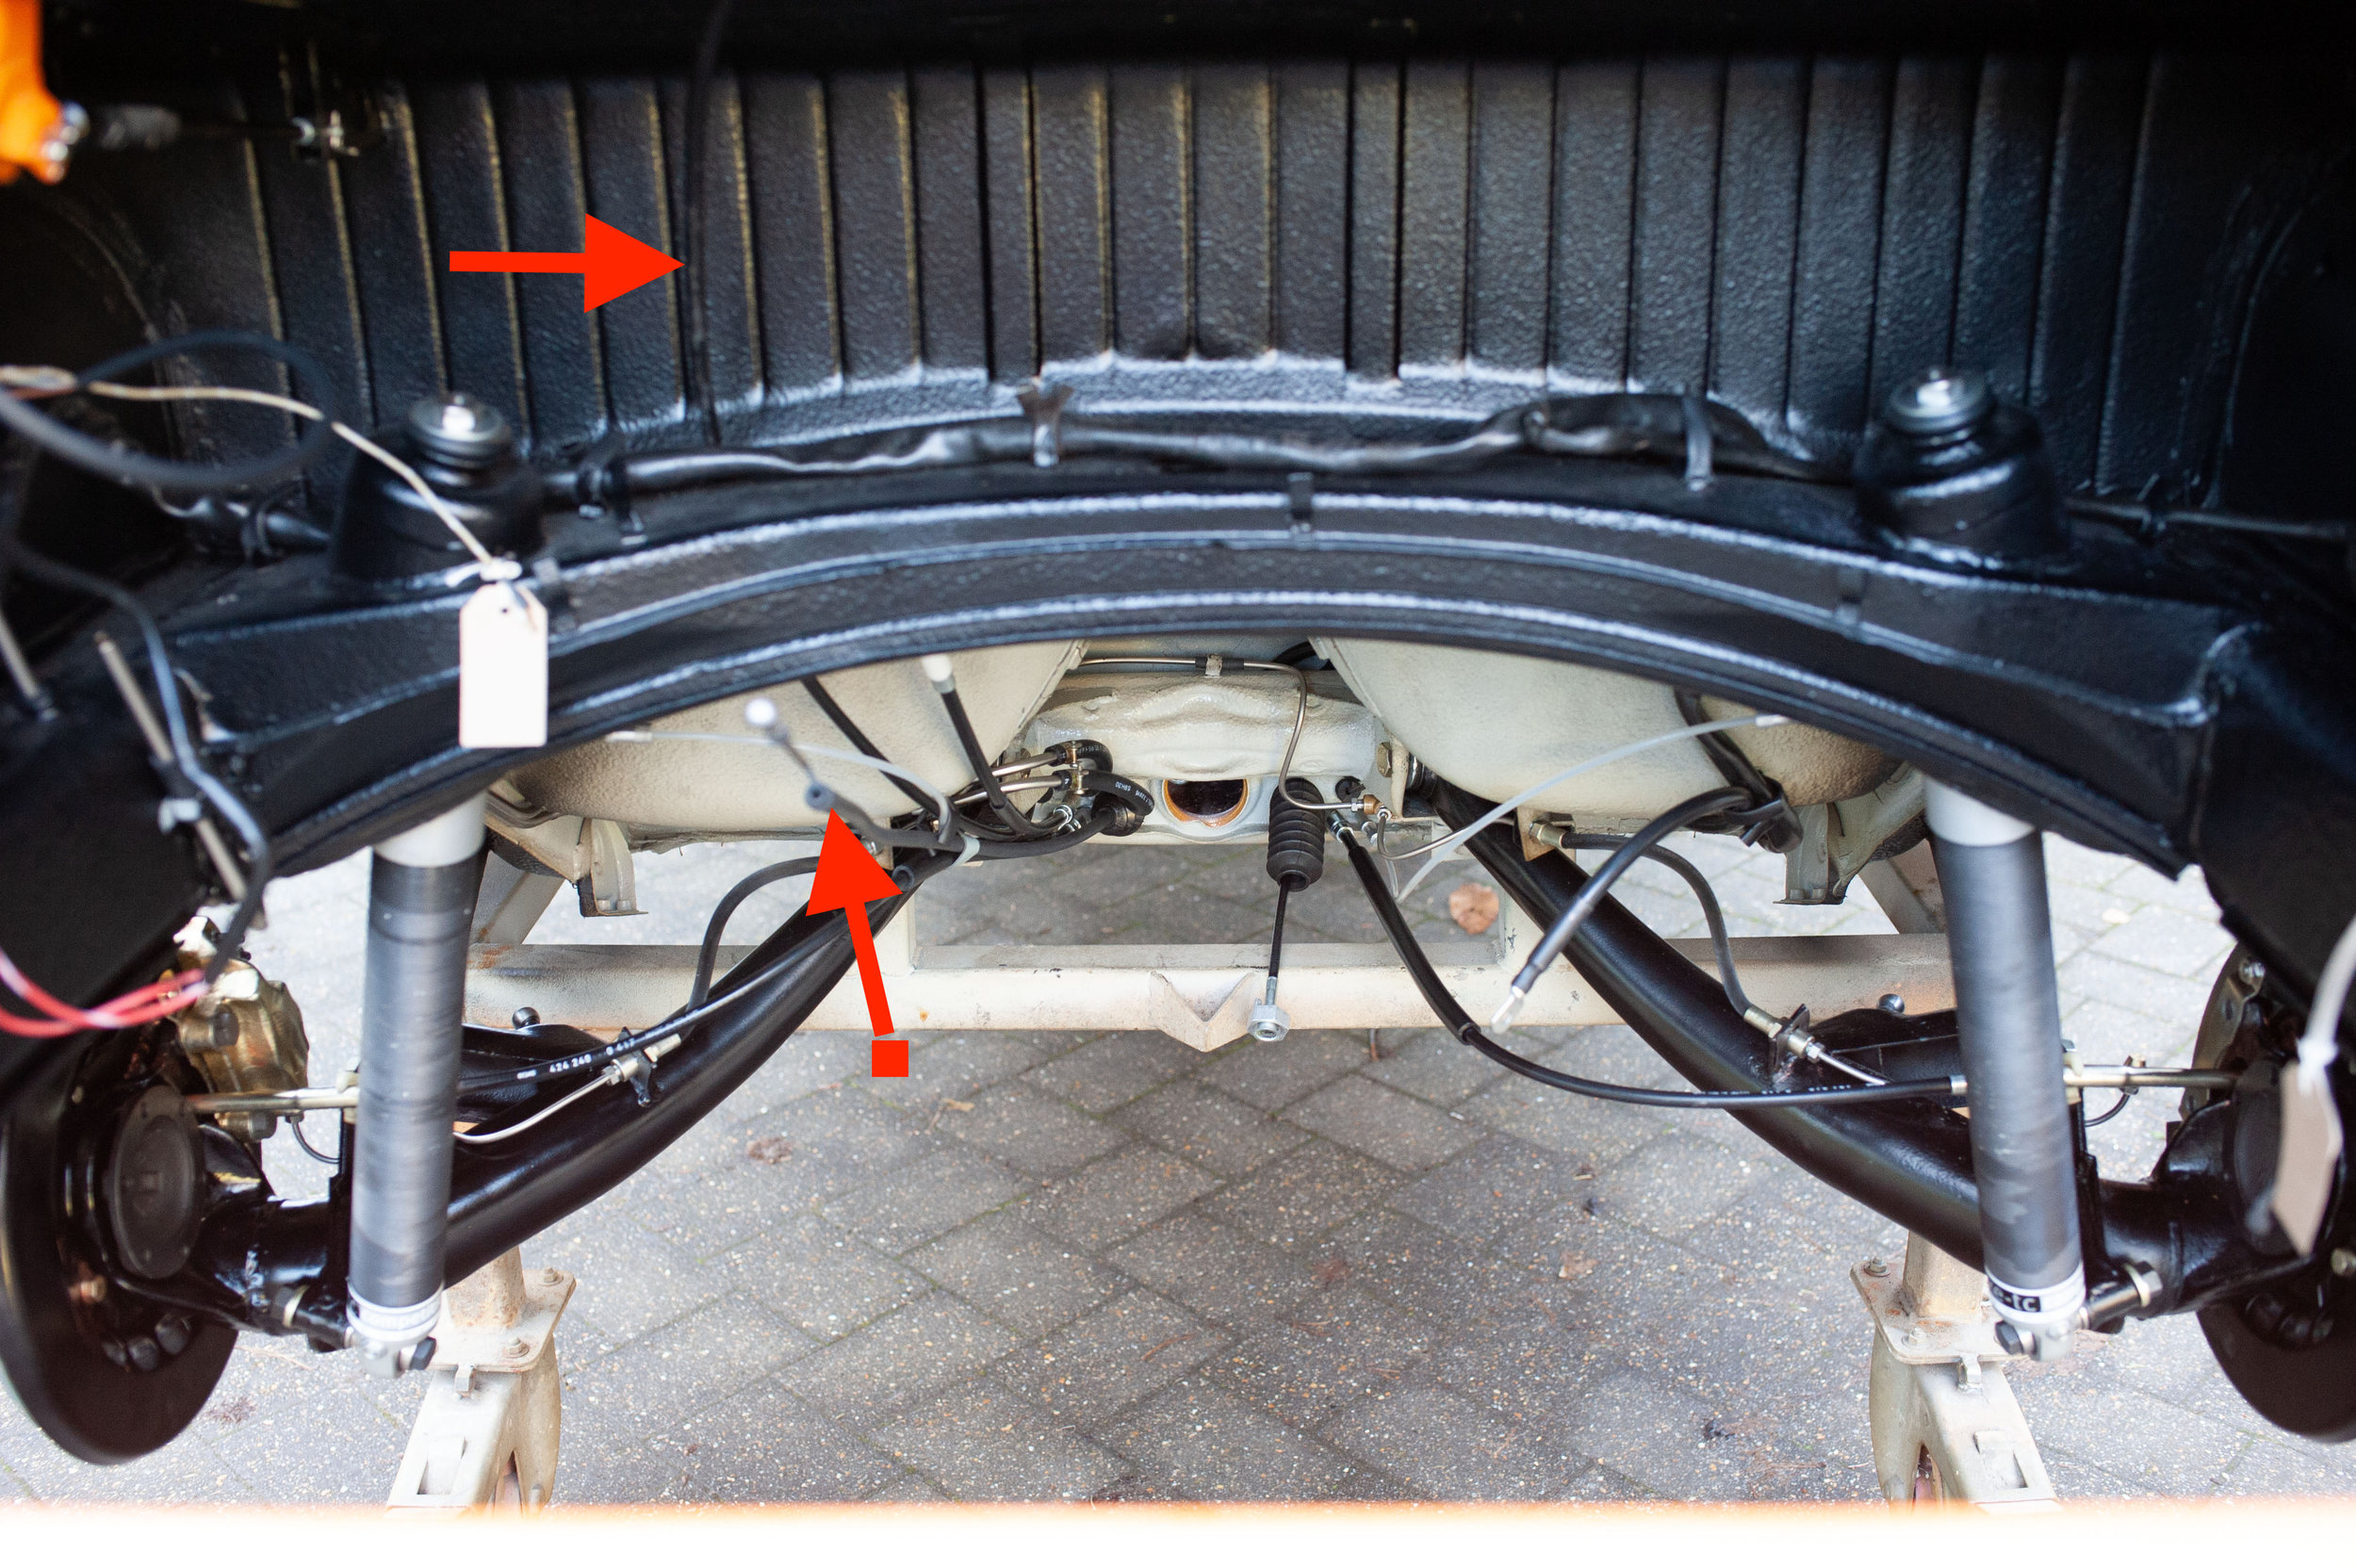
  5. Geometry. As previously mentioned, a first pass attempt at decent geo has been done. Not perfect yet, but pretty good. When everything has settled in, I will probably take it to Center Gravity for the full works. I might also be unable to resist tweaking the damping away from exe-tc's recommended settings.... I mean, they have adjustors, you can't blame me for adjusting...
  6. Fuelling. I had a decent baseline (and newly-refurbed MFI pump and throttle bodies), so not much needed here. I've gone a few clicks leaner, but not going too crazy. A future job is rolling road with mixture sensors, to optimise.
  7. Timing. Again, main work had been done. I've tweaked slightly, using the programmable curve of the CDI+. Will revisit on the rolling road.

Click here for the full restoration story...

Amateur Hour is Over

Having now got the car working, and UK registered, it was time for a professional to take a look. Among other things the geo needed sorting, and I felt it wouldn't hurt to have a non-idiot check for idiot mistakes.

The photo makes it look like a nice drive in the country, but actually quite stressful. Spongey brakes and terrible geo are minor amusements on a quiet B-road, but much less funny when trying to keep up with rush hour traffic. Still, we made it in one piece.

Problems found and fixed by the expert were:

  • Some loose suspension and brake bolts (my fault, or my torque wrench is over-reading). I do have a bit of a tendency to be gentle with threads, so probably me.
  • Leak from coupling at fuel tank. I knew about this one but left it to someone else, since it's a nasty job. Not entirely my fault, although I should have noticed the damage to the coupling surfaces before I installed.
  • Faulty alternator and / or regulator had fried the battery. Battery replaced, alternator upgraded to a Jonny Retrofit special, external regulator now redundant. Unless I get ambitious and install electric aircon, a 175A alternator is going to lead a very gentle life in my car! Hopefully that means it will be nice and reliable. https://www.classicretrofit.com/collections/upgraded-alternators
  • Geometry now sorted. I'm hoping it will drive rather better now...
  • Reverse lights not working. My fault, I damaged the connector to the switch on the gearbox during one of the many engine drops

I guess I feel a little bit disappointed with myself that various snags needed sorting. I do have an actual engineering degree (...I know, get him...), so I should be able to do up a bolt properly. More generally the car is still a little way from being perfect in detail areas and, since perfection is the goal, it feels deflating in some ways to still have a fair bit of fettling work to do.

Ah well, I chose this hobby. First world problems, without a doubt... Next “job” is to drive 1000 miles to bed things in, get to know the car, and make a few tweaks…

Finally: if you want to know what a fried battery looks like, please see below. Check out the bulge in the casing! I think I will count this as a lucky escape - the luggage compartment might not have looked too pretty, had it burst.

IMG_3514.jpeg
First Drive

So with everything basically working, lovely weather, but no UK registration, what else could I do?

I insured it on the chassis number and went for a little early evening drive....

Oil Leak(s): Progress

Previously... we had identified this point of leakage from the cooler area, and eliminated the cooler itself from our enquiries - it pressure tested fine.

Leak.gif

With cooler removed, the area looks like this:

IMG_3013.jpeg

And Porsche has been kind enough to give us a clue about one possible source for a leak:

TSB_Oil_Pipe1491627506.jpg

Close up of the cast-in pipe on my engine:

20200627_175921787_iOS.jpg

At this point we have a suspect, but no proper smoking gun. Because, on my engine, the side of the cast-in pipe outside the oil cooler cavity is in exactly the same state, and is not leaking.

Still, it can't hurt to follow the procedure in the service bulletin, which can be summarised as "gunk it up".

With the help of those more expert than me (thanks DDK), I realised there was another potential problem in the oil cooler area.

On the left, the studs behind the cooler on my car. On the right, an example picture of what should be there...

As well as the obvious difference of the domed nut, more importantly the correct washers are thick and have a chamfer on the inside edge to retain an o-ring. Same as all the other stud nuts. My engine had no o-rings.

Correct parts ordered from my OPC and fitted, and, boom!

Leaks are gone.

Phew, simple fix in the end...

Lightweights and Seats

For a long time I have regarded the lightweight variants of the 2.0S, 2.2S and 2.4S as inspiration. Not super hardcore as they emerged from the factory, but perhaps would have been purchased by folks who intended to do a bit of mild competition. And which had a few "sports purpose" parts. Of course some were used at the basis for serious competition cars too, but I'm talking about the milder ex factory spec.

For example one classic reference is the very early '69 lightweight car 119300009:

The 1970 marketing material tended to show the S in lightweight guise.

I believe that, initially, lightweight was the standard spec for a German market S (customers could optionally reinstate the luxuries, free of charge):

Consider also the M471 lightweight option offered for the slightly later 2.4S, as shown here):

My car incorporates a few gentle (reversible) references to those cars, including LSD, 380mm steering wheel and the 7R wheels on the back. So I was pleased to buy these seats today. Aged Recaro-style lightweights, similar to the M471 car pictured above, with nice patina (sun-faded corduroy - yes please) but not knackered:

Admittedly I’m blurring years and specs, but they feel right in the car. I like them as a finishing touch.

Oil Leak(s): Oil Cooler?

The main problem revealed by initial running was a fairly sizeable oil leak. Or leaks.

Not quite a gush, but more of a drip than a weep, if you know what I mean. Seemed to be coming from the oil cooler area:

Leak.gif

I had lazily / optimistically just bunged the original oil cooler back in, cleaned but not pressure tested, so the cooler seemed the first likely culprit to check.

Following a modest investment in a Stomski Racing pressure tester (and yes, I do realise there are cheaper ways to achieve the same result, but I can never resist buying another slightly obscure tool...), the result: nope, cooler is fine:

IMG_3010.jpg

So having established that the cooler itself was probably not the culprit, I disappeared down the rabbit hole of internet wisdom about the cooler-engine seals. Long story short, there are various types:

Scanned+from+a+Xerox+multifunction+device0011306861983.jpg

...and many folks believe that not all types seal properly...

http://forums.pelicanparts.com/porsche-911-technical-forum/795980-oil-leak-dilemma-part-2-damn.html

So I got all excited thinking this might be my problem.

I sent this pic to Barry....

IMG_3012.jpeg

... and proposed that the pattern to the left of the large hole suggests that one of the high pressure seals (at the top, out of shot) has leaked, oil has ended up in the recessed area of the cooler, and made its way out via that blackened channel. Not necessarily during my ownership.

Barry was, as usual, the brains of the party. He pointed out that my leak happened even when turning over on the starter to get a bit of oil pressure before the first run. So at very low oil pressure, maybe 10psi. He wasn't buying my failed seal idea, and when I switched on my brain I had to agree.

So I ordered a new set of seals from my OPC, on the basis that I might as well replace them and the Porsche ones were the most likely to work. For the record, Porsche sent the green type. Many thanks to Paul at OPC Guildford for delivering them FoC. A quick go in the ultrasonic cleaner, and then the cooler went back on the engine:

IMG_3060.jpeg
Engine Out Again

Where were we? I think the borrowed throttle bodies were on, driveshafts fitted, ready to give the engine a run and try some gentle movement under the car's own steam. So we (meaning Barry and I) gave it a run. Resulting in good news and bad news.

Good: Starts easily, no funny noises, revs cleanly and responsively, good oil pressure, feels fine. When we dumped the oil after a few minutes running everything was nice and clean with no nasties to be found. So the basics seem good - phew! - but doubtless lots of tweaking will be required in due course.

Bad: Well, the day ended with more of this sort of nonsense:

DSC_8708.jpg

....and the engine back out of the car:

20200303_074306438_iOS.jpg
Driveshafts
  • Unbrako 12.9 screws - check
  • Schnorr washers (correct way up) - check
  • Dog bone plates - check
  • Proper grease - check!

Grease in a bag means squeezing it into the joints is slightly less messy than it could be. Bit like icing a cake, apparently.

Having already filled one side with grease and fitted it to the car, I remembered the gaskets... 2nd time lucky, all good now.

Naturally, given my recent form, this was going much too well and my luck couldn't hold. Sure enough:

The stretch bolt into the diff turned out to be rather less stretchy than I'd hoped (sheared when torquing it up - not mega torque, 44Nm IIRC).

Opinion differs as to how reusable these are. Mine turned out to have reached the end of its service life, I think... Replacements ordered from OPC

(Note - I do realise that the "nipple" on the end, needed for the "simplified" diff which unhelpfully self-destructs when you remove these bolts, is unacceptably worn. On my car the diff has been replaced by a Quaife LSD, so the nipples are redundant).

Click here for the full restoration story...

2020 Rebuild 1Richard Fry
Borrowed Throttle Bodies

Good news: Some throttle bodies went on this week.

Bad news: Not the throttle bodies that belong to the orange car. I have temporarily nicked the set from my '69 2.0S...

Rendering a perfectly good car inoperable is clearly not ideal, but it's a very easy job to swap them over (and back in due course). Everything else is ready for an engine run, and I feel I need to know where I stand with the engine sooner rather than later. Only one way to find out...

So wrong, really. Poor 69S.

It will at least give me a chance to tidy up a few engine bay niggles. New fuel hose probably not a bad idea, for example.

Please excuse messy wiring, mechanical oil pressure gauge, etc on the 70 car. Test mule mode.

2020 Rebuild 1Richard Fry
Engine In

After a bit of a wait, my engine is back from the builder and we've put it in the car. Stil waiting for throttle bodies...

2019 Rebuild 1Richard Fry
Summer

It's lovely and hot here. Proper english summer. Hot enough to melt wax, in fact:

DSC_8656.jpg

No work is happening on the car.

Front Mounted Oil Cooler

A little trial fit of the front mounted oil cooler, the hard lines in the wheel arch, and the flexible lines that connect to the cooler.

Engine Bay Stuff - Oil System

On the other side of the engine bay, the oil tank is in and I have plumbed in the plumbing. So the oil console / thermostat / filter base is mounted, and I have connected it up to the fore-aft oil pipes that run through the sills to the front cooler:

Engine Bay Stuff - Fuel System

The fuel system is now pretty-much finished.

For those who say they unwisely use my pics as reference, please note there is a deliberate mistake here. I do know that the outlet from the fuel filter is currently connected straight back to the return, rather than to the MFI pump (which I understand is the conventional scheme for those who like their engine to receive fuel). Before the engine goes in I will test it like this, just recirculating, to see if we have any leaks.

I've also got the engine tinware seal in (the one that goes around the perimeter of the engine compartment). Like all jobs involving rubbery bits, installing it was no fun at all. But I do quite like the cute little hole in the (Genuine Porsche) seal, for the fuel pipe - very neat and tidy.

This is a Lot Easier...

With this scheme of employing professionals, it turns out I can sit in the garden drinking wine and work still happens on the car.

Don't know why I didn't think of this before.

Headlining and Screens

Just for a few days, I’ve handed over to the professionals. When it gets back, the car will have dash, screens and headlining installed. Amateur hour will then resume.

Throttle Linkage Simplification - “Morse” Cable Scheme

Because I'm a genius, unlike those Porsche engineers, I've decided I can do better than them in a couple of areas.

Hence the non-standard cables highlighted below:

DSC_8624 copy.jpg

The lower one in the pic is for the throttle.

I'm not a massive fan of the standard throttle linkage on a '70 car. It's an awful lot of parts to do a simple job:

throttle+linkage+before1160974842.jpg

Plenty to go wrong, in an area where going wrong can have unhappy consequences.

This thread on Pelican suggested an alternative scheme: http://forums.pelicanparts.com/porsche-911-technical-forum/309504-early-911-replacing-throttle-linkage-morse-cable.html

All the missing bits in this version of the diagram are replaced by a "Morse" cable:

throttlelinkageafter.jpg

In my case the specific type of cable I have used is called a Teleflex TFXTreme. Most commonly used on powerboats, I believe, and available from your friendly local yacht chandlery. Incidentally in buying these it turns out that, although Yacht Tax seems to exist, it's nowhere near as ridiculous as Porsche Tax.

Anyway.... this sort of thing:

The advantages of this type are high quality materials (corrosion resistant) and, importantly, small bend radius - nominal spec is 100mm minimum, but (in new-out-of-the-box state anyway) they remain smooth well beyond that spec. Point is they are flexible enough to easily make the control run for the throttle.

Final note - obvs my genius statement is slightly tongue in cheek. In fact Porsche changed the design later on, to get rid of all that bell-crank on the side of the gearbox nonsense. So a 964 has a cable run fairly similar to mine (but less flashy cable).

Click here for the full restoration story...

Through-Tunnel Plumbing, Etc

Per the pics, the various fuel lines, brake lines, cables and electrical bits at the back end, and through the tunnel, are done.

They make the nice clean shell look really untidy.

I think my next resto might focus only on being nice to look at, so I can get rid of most of this clutter.

Oil System

Oil and Fuel system refurbs are in progress. For the oil lines, the original fittings are all fine, and I think look much better than modern crimped versions. The old fittings are easy to work with and reuse. So what we see below is:

  • original aluminium fittings, just vapour blasted. These are quite nice because they have the '69 date stamps
  • original steel elbows etc, plated. Shockingly I have deviated from the original finish. I started by yellow zinc plating, but they looked pretty awful (surface finish not good enough). So these are now plated in satin nickel, with a base coat of copper. A bit like the standard chrome plating process. A bit blingy, but I like it.
  • New hose, obviously. Cohline 2633.
DSC_8591.jpg
2019 Rebuild 1Richard Fry
Oil Tank

Moving on to the oil system, I've made a start on cleaning up the oil tank.

Turns out it's copper plated, which I dimly knew was sometimes done, but thought it only applied to special cars like RSRs.

20181012_101123647_iOS copy.jpg

The tank is now away being stripped, acid dipped and copper plated.

The strip and dip will make me feel more comfortable connecting this thing directly to my newly-rebuilt engine - need to be rid of any crud and rust. I will admit that the copper part is completely pointless overkill, given that it will be obscured by some black paint. But I will know it's copper plated under there, and maybe one day a bit of paint will rub off and (if I have my head under the rear wheel arch for some reason) I will feel like a restoration genius. Not like a weirdo at all.